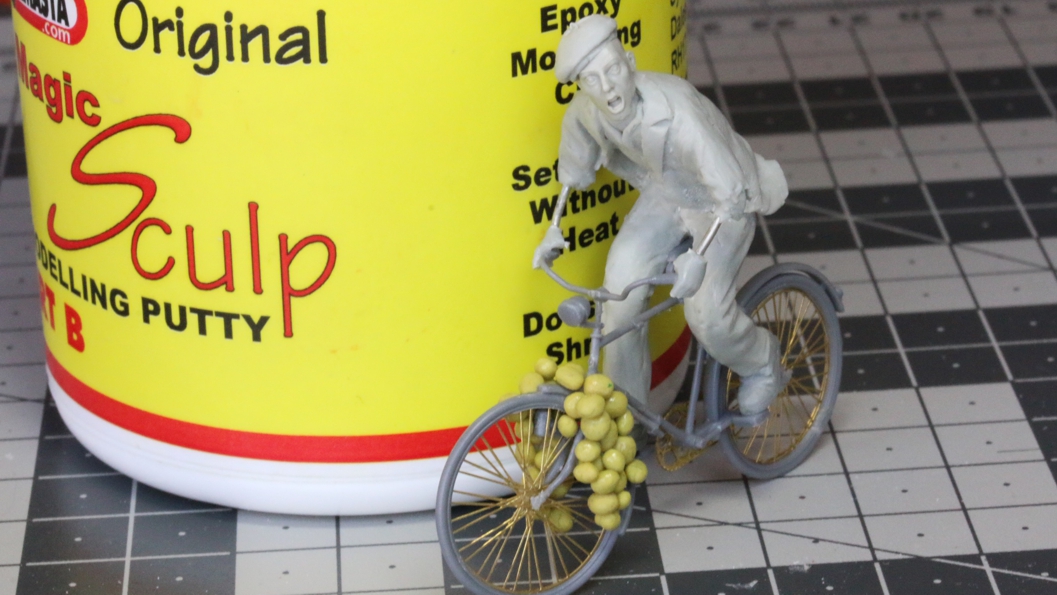
Posted on Leave a comment

The Magic to Sculpt: Your guide to making the most of Magic Sculp Epoxy Putty

Magic Sculp Epoxy Putty is used to sculpt, repair and create models

Whether you call it Magic Sculp, Magic Sculpt or any other name starting with A, B, C or D, the one thing that most model makers, sculptors and restorers will agree on is this – that Magic Sculp(t) is a pretty magic epoxy modelling putty.


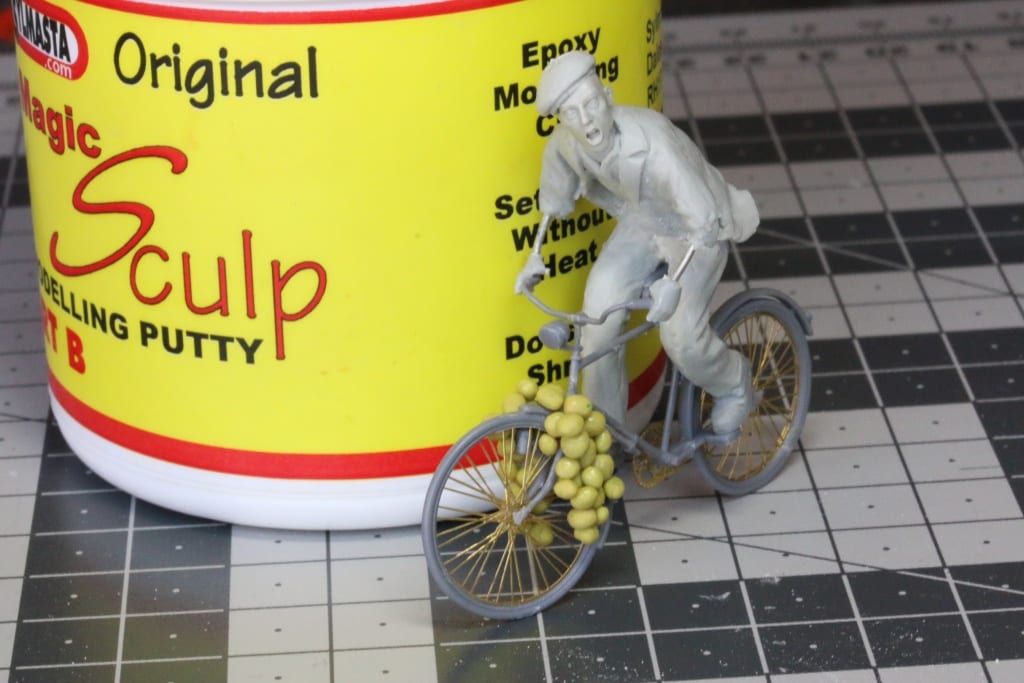
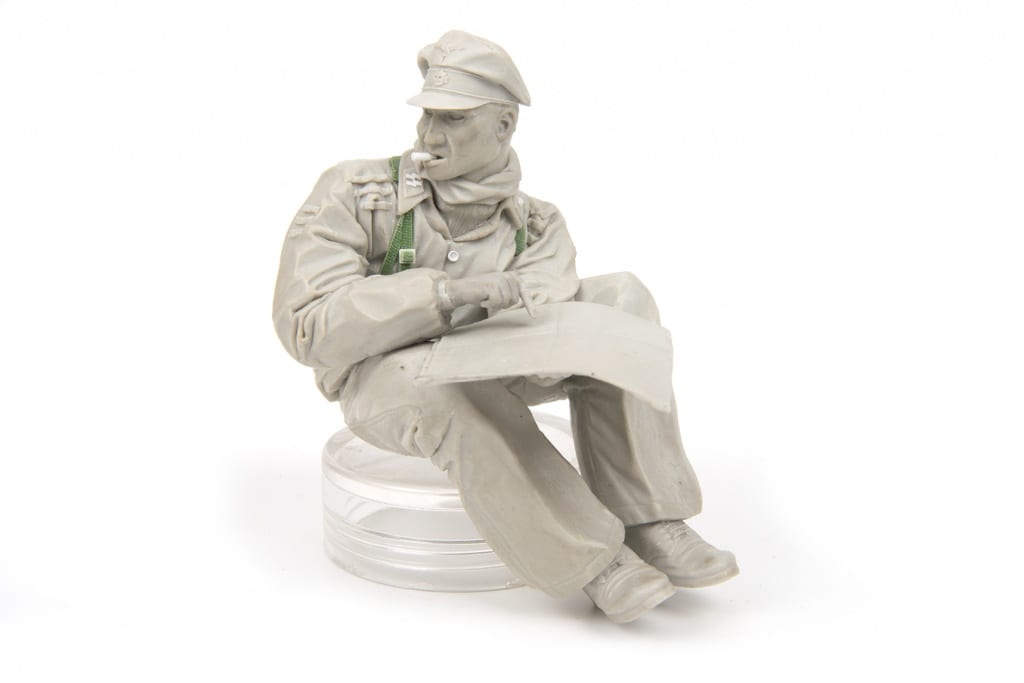
Our sales figures here at SylCreate tell us as much, with it being one of the most popular products we sell. It is also used in some of the most fascinating and widest ranging examples of work; from modifying existing military figures to creating maquettes to sculpting busts of Captain Maintaining from Dad’s Army.

And that is before we even mention all the uses it has in repair. It fixes chipped and damaged statues and other forms of ceramic. It fills cracks. It resists temperatures to 150°C, so it is suitable for exterior use unless you happen to live on the surface of the planet Mercury. Mixing Magic Sculp with brick dust will even create a putty which seamlessly fills damage to brickwork and stone.

What makes Magic Sculp so popular is the ease with which it can be kneaded by hand, used to sculpt and then cures to a ceramic-like material at room temperature without the need for heat.

The basics are straightforward enough, and yet to help you really make the most of Magic Sculp, we decided to put together this how-to guide which answers some of the most frequently asked questions about the product.

How to mix Magic Sculp

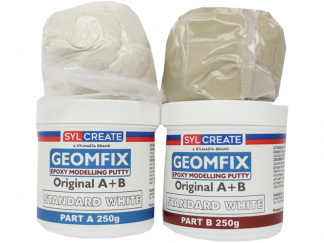
Magic Sculp is supplied as two separate components. The lighter grey is the resin, the darker grey the hardener. When the two are mixed together, a chemical reaction takes place which will slowly turn the soft putty into a rock hard material which can can only be removed by chipping it away.

The recommended mix ratio is 50-50 by volume. Break off equal sized balls of resin and hardener and knead them by hand until they turn a uniform grey colour with no streaks. The putty is then ready to be shaped, moulded and applied as required over the next two or so hours before it cures and becomes unworkable.

Changing the mix ratio of Magic Sculp

Changing the mix ratio of Magic Sculp will reconfigure the properties of the putty. Using more hardener will reduce the cure speed from the standard two hours, also leading the set putty to have higher brittleness.

Conversely, more resin will extend the setting time. This is useful if you are using large quantities of putty and are concerned that it may begin curing before you have had time to work with it.

Colouring Magic Sculp

It is possible to colour Magic Sculp by adding epoxy resin pigments before mixing takes place. Pigments should be in powder form; paints or solutions can impact heavily on the chemical behaviour of the putty, whereas powders are less likely to do so.

We always recommend testing Magic Sculp with your chosen pigments before committing to their use in a full-scale project as some will work better than others. Mix up a small amount of Magic Sculp and leave it to cure for 24 hours to assess what impact there is on the cured material.
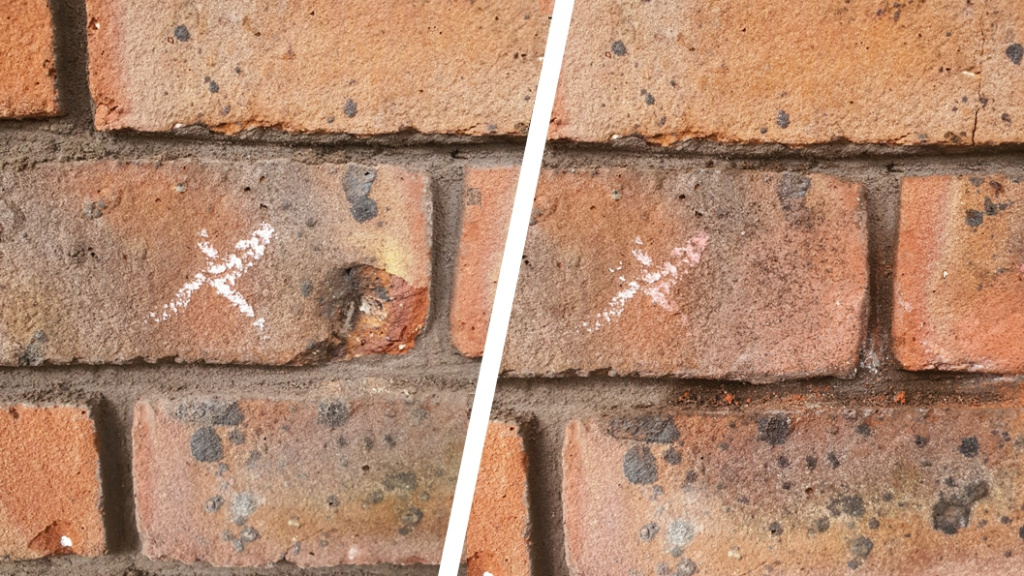
Magic Sculp coloured with brick dust creates a seamless repair to a damaged wall

Another option for colouring Magic Sculp is to paint the cured putty. Paint adhesion is improved by using a primer, but it is not necessarily – most paints will take straight to the hardened material.

Alternatively, we manufacture Geomfix Colour Epoxy Modelling Putty. Geomfix is a two-part putty with similar properties to Magic Sculp, available in 23 different colours based around Swarovski crystals and used mainly to sculpt and create jewellery. Pre-coloured epoxy putty removes the risk that adding pigments will not work.

Materials Magic Sculp will adhere to

Magic Sculp will adhere to a metal, glass, stone, wood, ceramic, jewellery, fabric and many more materials. Newly mixed putty will also adhere to already cured Magic Sculp, meaning you can return to projects after long gaps between work. If the cured material is especially smooth, sand the surface first to improve adhesion.
The same preparation process is needed when using Magic Sculp with some plastics, like polysterol or stryrene. One alternative to sanding when working with plastics is to apply a thin layer of plastic cement or PVC glue and bond the putty to this instead. Magic Sculp will not adhere to a painted surface. Paint can be removed using sandpaper or by drilling capture holes into larger surfaces.

Creating intricate detail with Magic Sculp

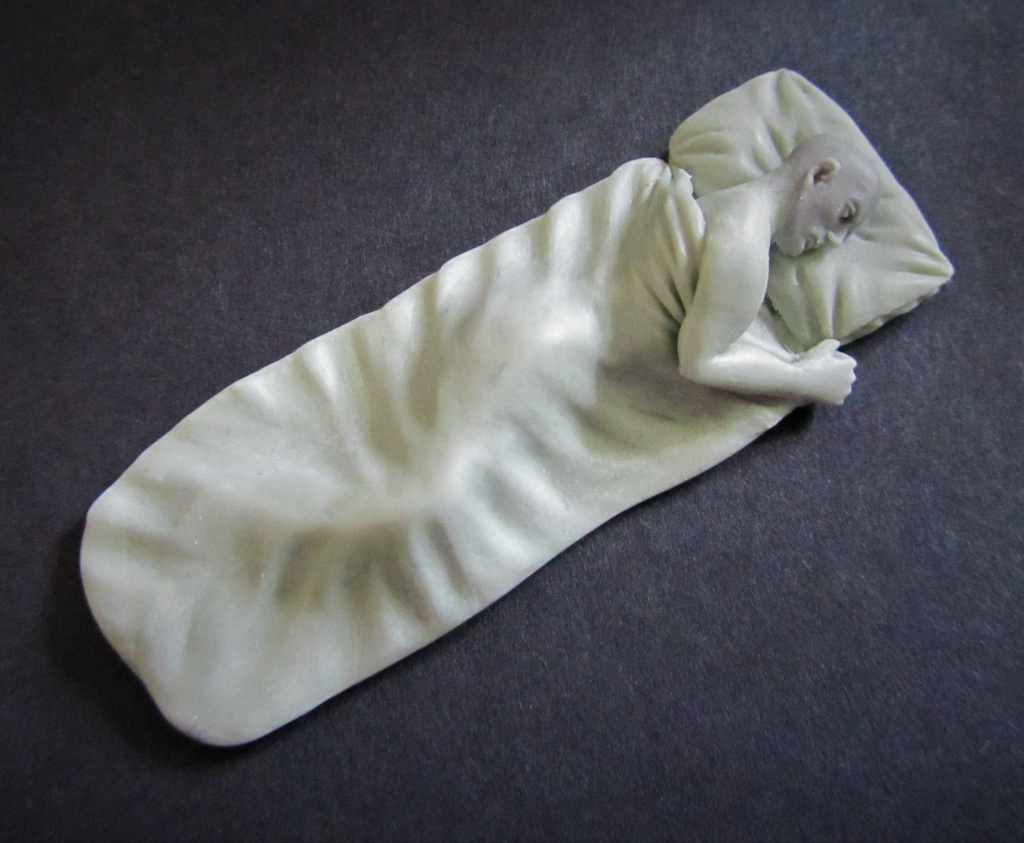
Magic Sculp is ideal for creating tiny pieces with highly intricate details. Paul Wade owns Red Zebra, a company specialising in military models from Middle East conflicts. His smallest sculpt to date using Magic Sculp involved a series of 2mm two hooks for the modification of a wrecker truck.
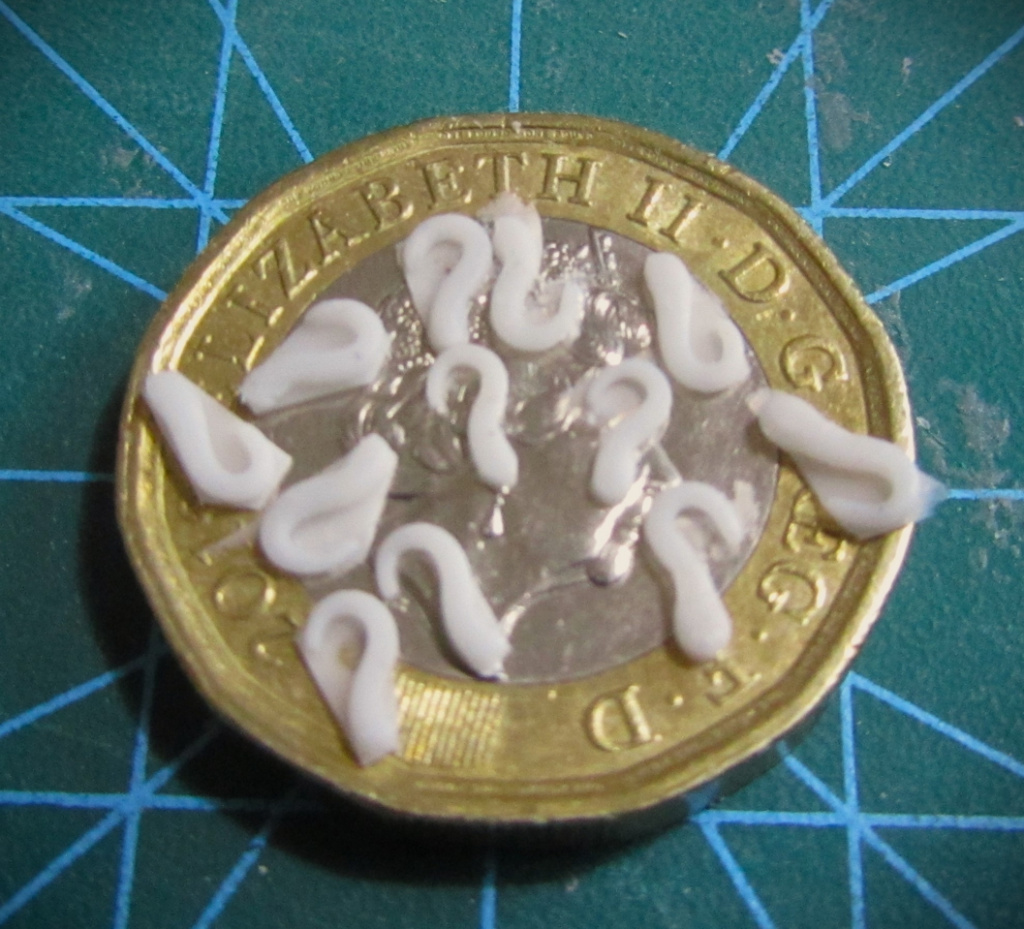
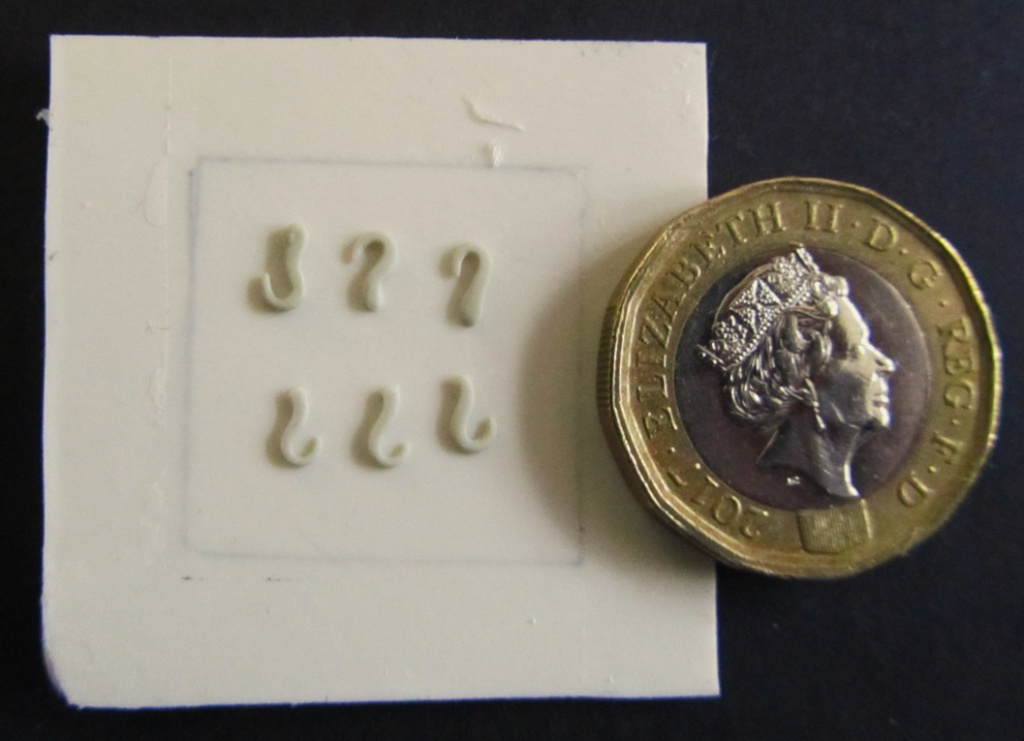
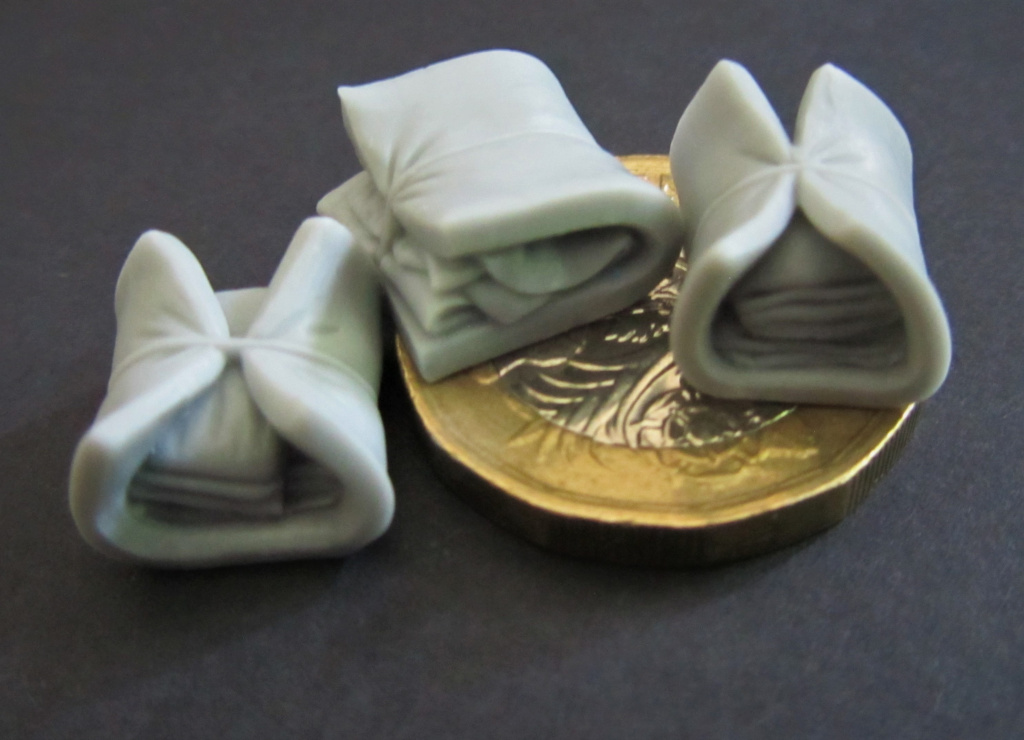
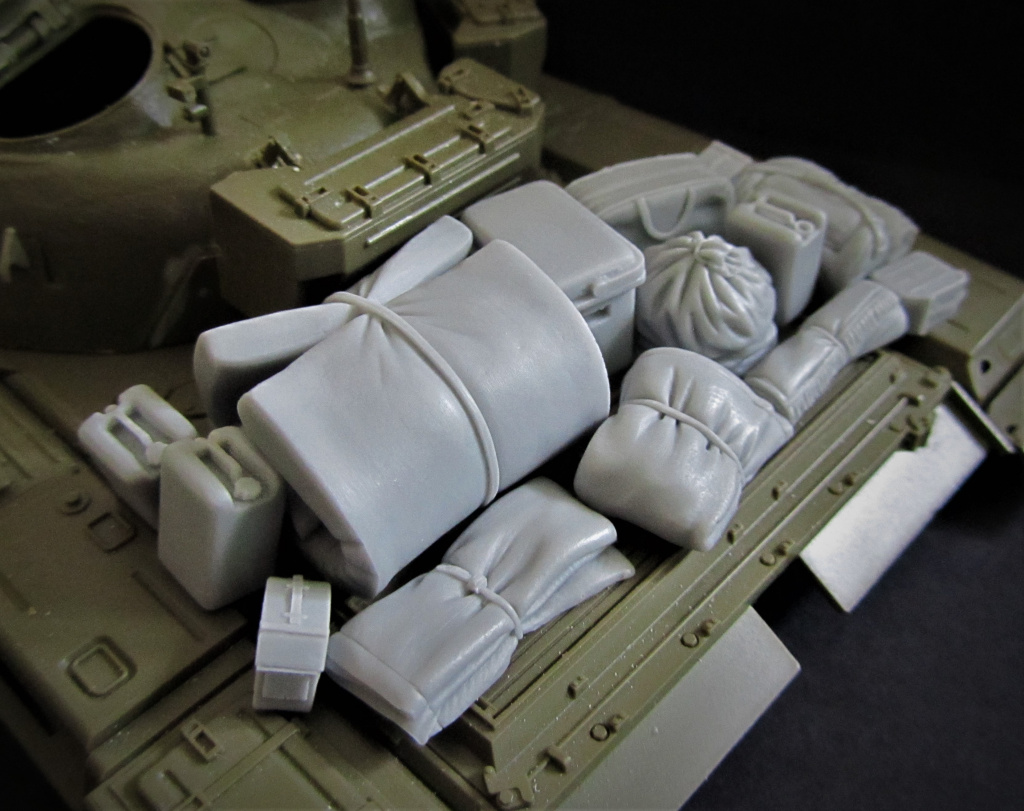
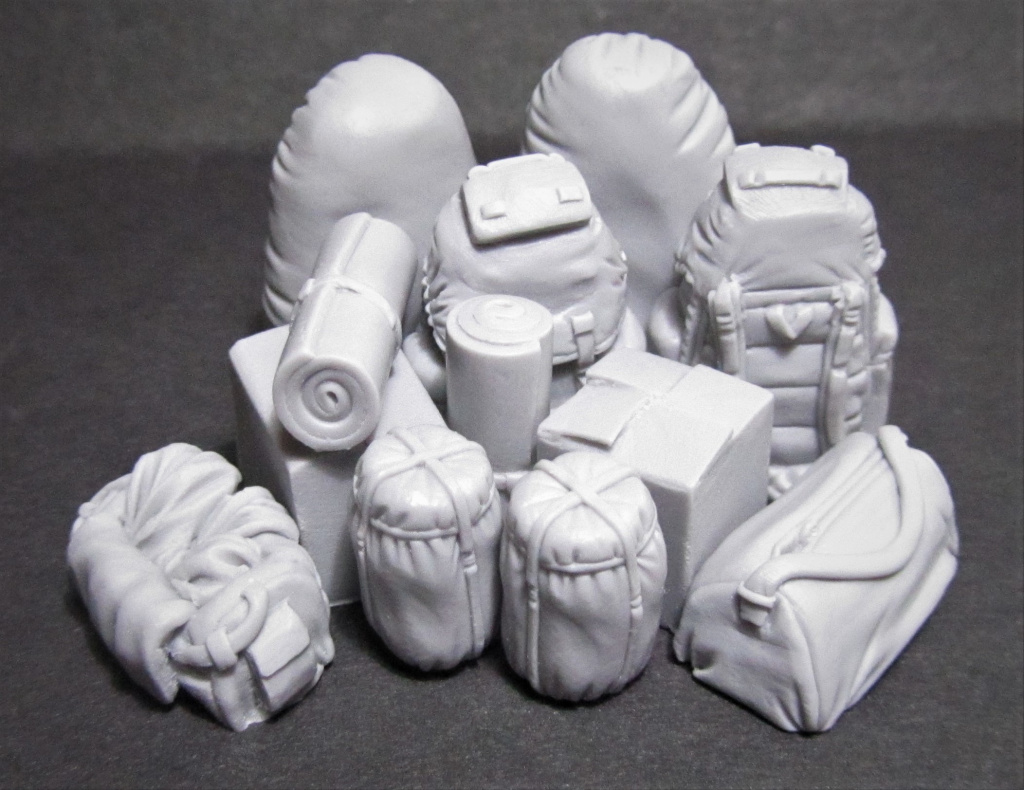
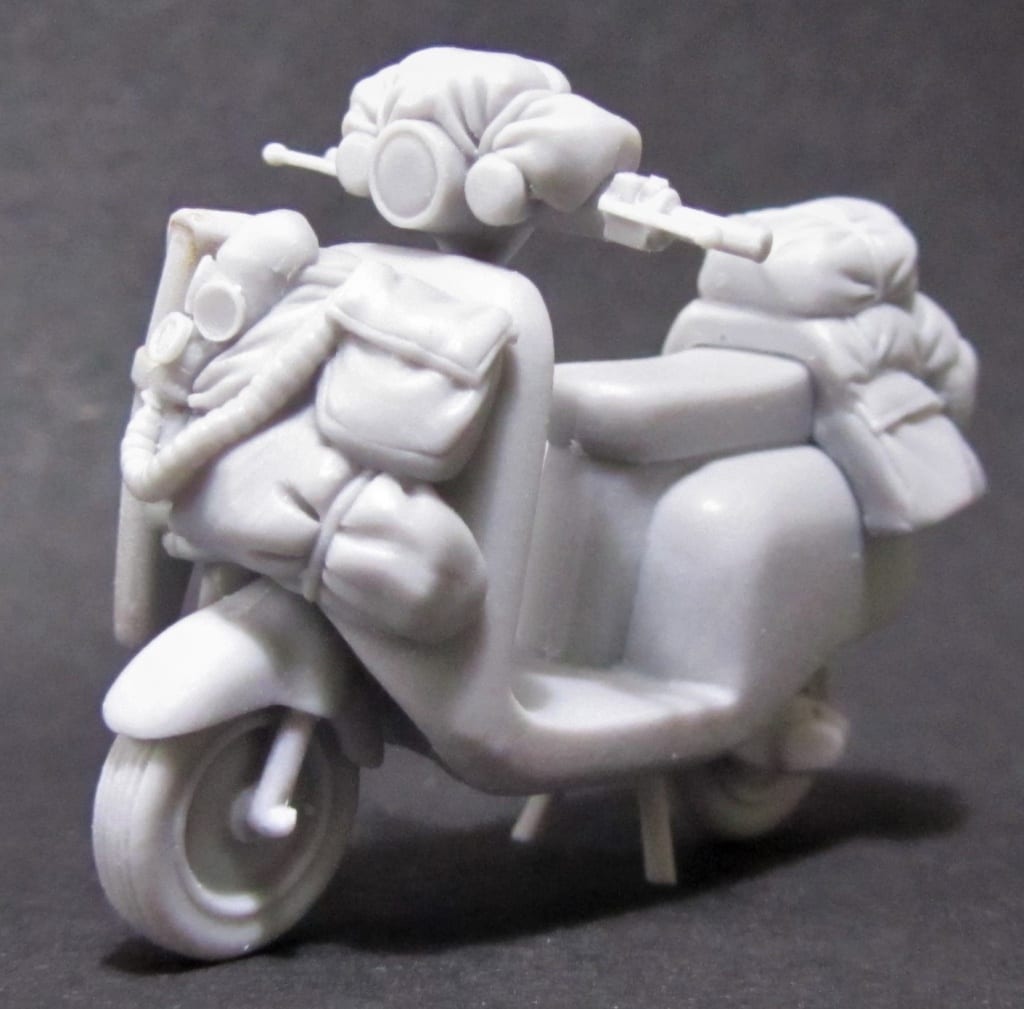
It can also be rolled to near paper thinness and will still set hard. Multi-award winning military modeller Dr Alex Clark uses Magic Sculp to scratch build military stowage, like tarpaulins and rolled blankets, where such characteristics are vital.

“It rolls very easily into thin sheets without tearing and gives realistic and natural folds and creases,” says Dr Clark. Red Zebra Paul adds: “Magic Sculp isn’t too sticky and even has a bit of a waxy feel. It can be rolled into very thin sections, especially if left to cure for a short while, so that it’s a bit firmer.”

Filling cracks in porcelain and ceramic using Magic Sculp

Because of the cured material’s similarities to ceramic, Magic Sculp is ideal for repairing cracked and broken objects. It can be thinned with a little water and made to penetrate cracks, where it will cure for a seamless repair.

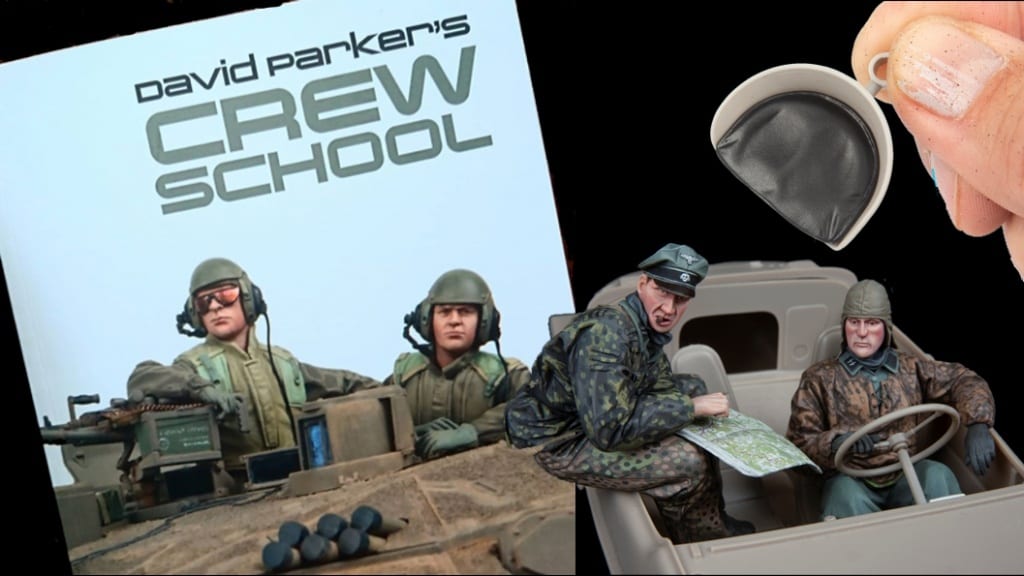
Using a wetted finger or sculpting tool helps create an ultra-smooth finish. David Parker writes in his best-selling book David Parker’s Crew School: “Magic Sculp has a soft consistency with just the right amount of resistance.”
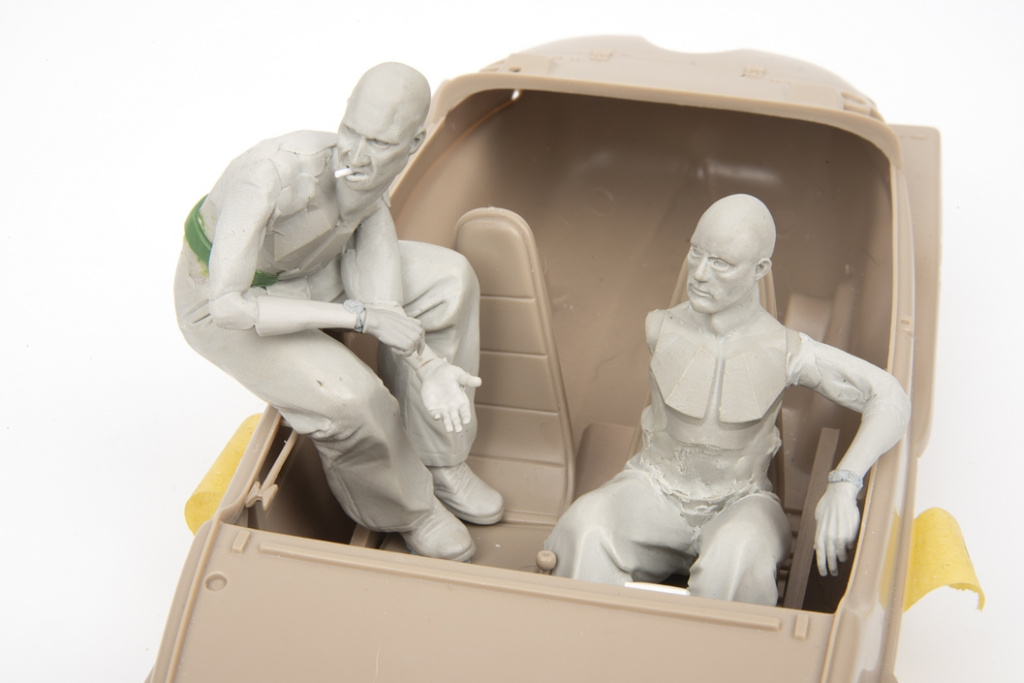
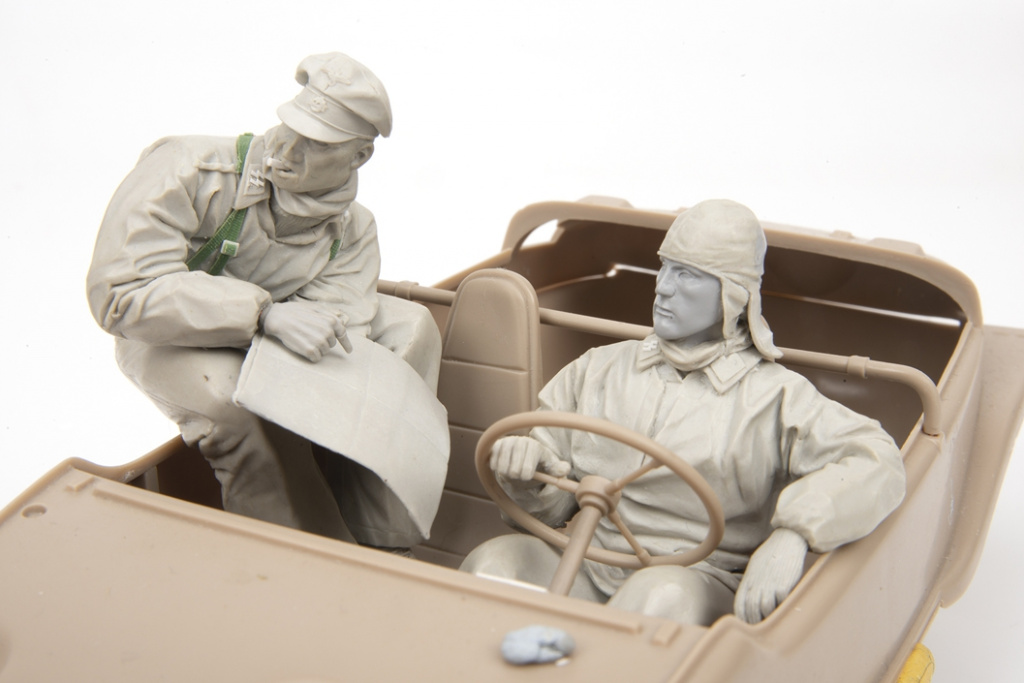
“It can be smoothed and worked by adding a touch of water to the surface. This needs to be very controlled or you can turn it to sludge quite easily but dipping a rubber tipped shaper into water will create a lovely smooth finish to your work.”

Making moulds with Magic Sculp

Magic Sculp can be used to create simple moulds or imprints. Whilst the epoxy is soft, pushing the item into the putty will create an impression of the details which will be maintained as it cures.

Using talc or a mould release agent prevents the Magic Sculp from sticking to the master too much. Talc or mould release agent can also be used to create a two-part mould using Magic Sculp.

The toughness of Magic Sculp

The most important question of all involving Magic Sculp more often than not involves how tough it is, especially amongst restorers and sculpturs making repairs or creating a sculpt which needs to be long-lasting.

And the way we always tend to answer it is by explaining the problems users will have if they want to reverse Magic Sculp. If the putty is not fully cured, it can be dissolved using warm water and soap or isopropanol, depending on how far along the curing process is.
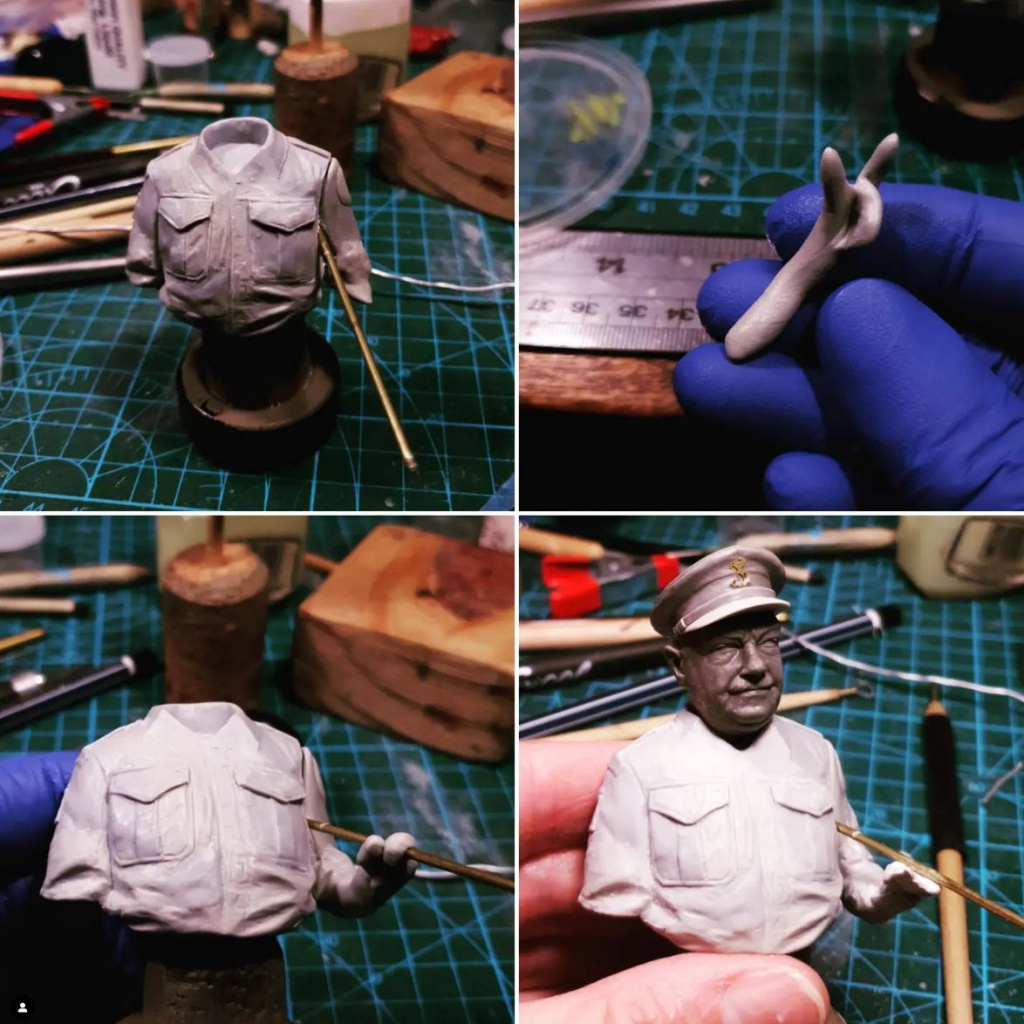
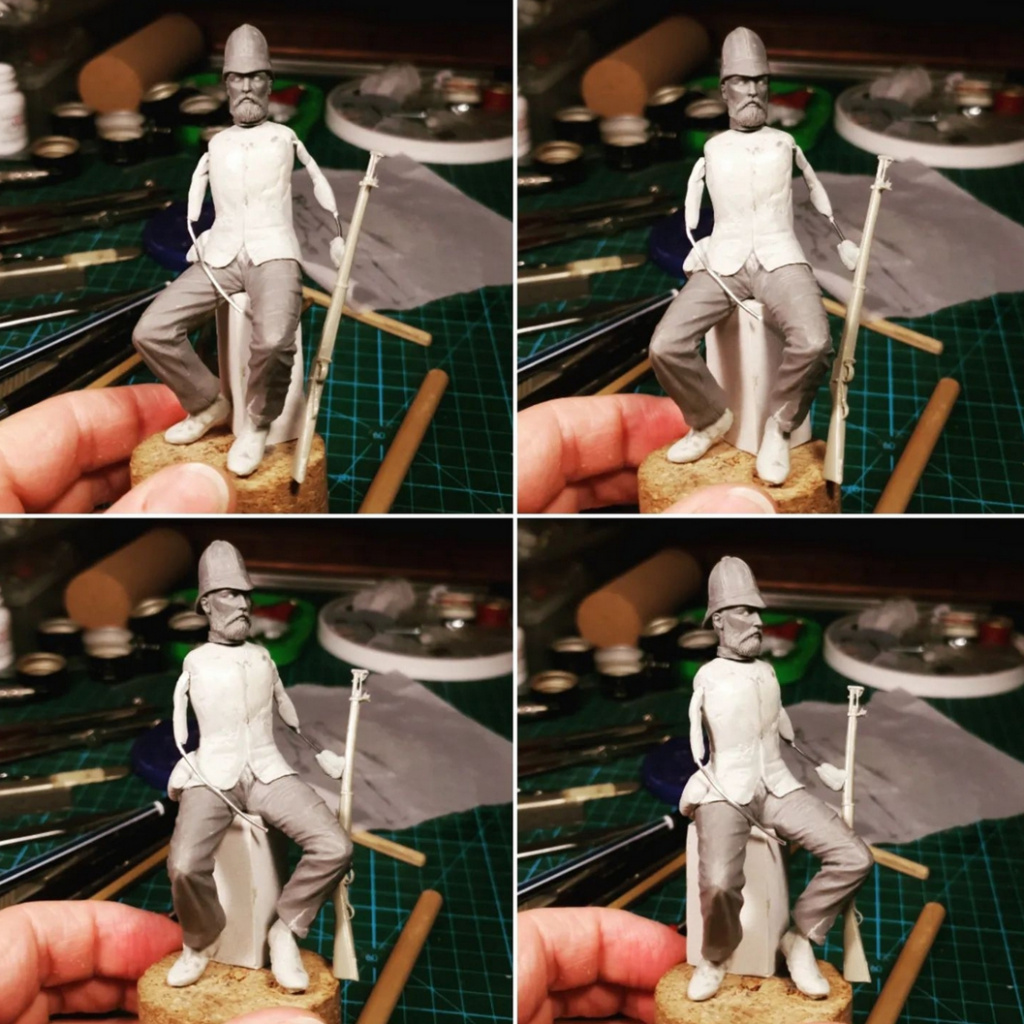
Once Magic Sculp has set, the only way to remove it is to chip away as if working with stone, or use a grinding motor toll. That is how tough it is and why it is is such a popular medium.

One of the only ways Magic Sculp can broken down is by UV rays. Over time, UV impacts polymer resins of the type Magic Sculp consists of. This can be overcome by painting the cured material. Paint offers protection agains UV, enabling the Magic Sculp to last, well, forever barring an unforeseen circumstances.

In terms of general outdoor use, the temperature resistance of Magic Sculp means it will not be harmed by exposure to average temperatures. Frost makes all materials brittle, so if sculpting for outdoor used it is advised to keep enough cross-section in parts.

Related Products


Related Articles

Posted on

Modelling in a heat wave: Tips for using epoxy putty in hot weather

Green Stuff and Magic Sculp are two epoxy modelling putties which can be challenging to use in a heat wave

How can the summer weather, its speeding up of cure times and its tendency to mess with the properties of epoxy modelling putties be overcome? For hobbyists, the answer might be taking a break from their model making by swapping the workbench for a pub garden or beach until the temperature cools down.

For those who sculpt for a living, those options are less viable. Unfortunately, business and cannot just stop because the sun is out. That means that the leading model makers have to find ways to work around the heat. We asked Kevin Adams from Goblinmaster Ltd and Paul Wade of Red Zebras Models for their hints and tips for using epoxy modelling putty in the summer heat.

A damp sponge, an air cooler and a lighter touch with “maddening” Green Stuff

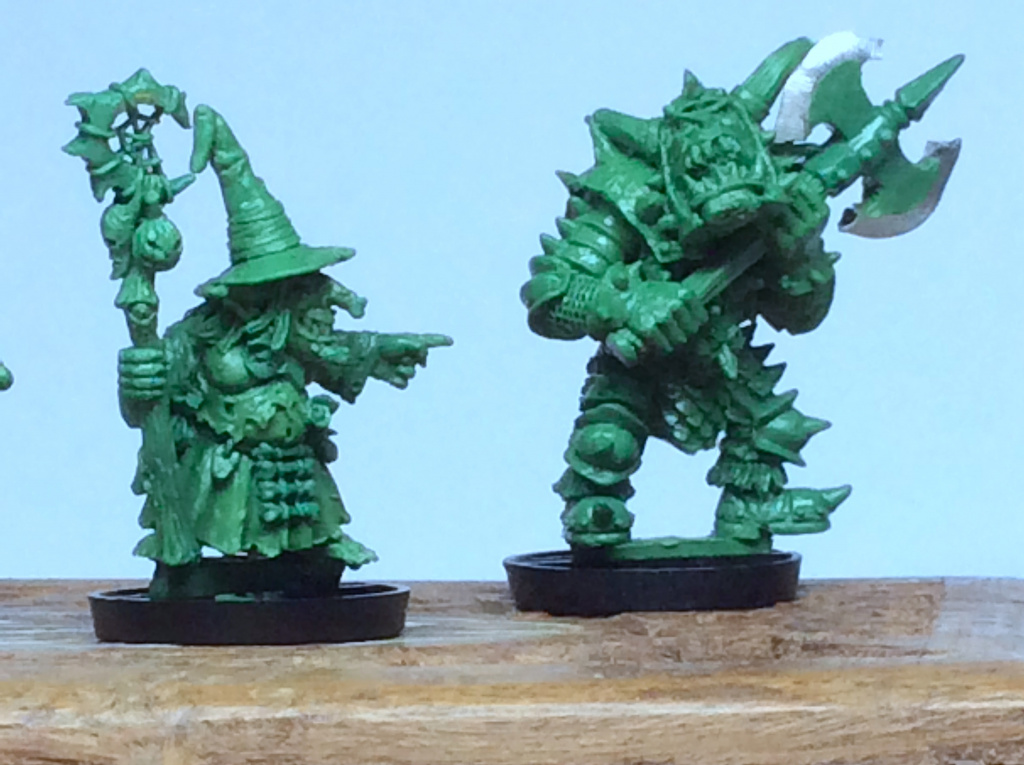
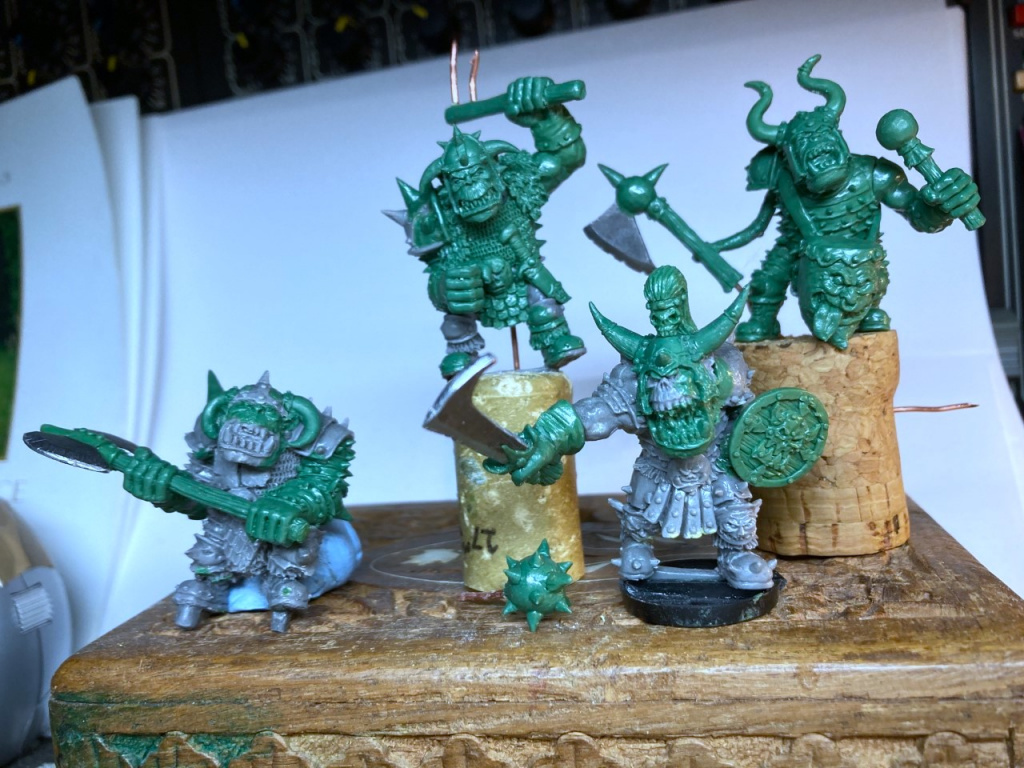
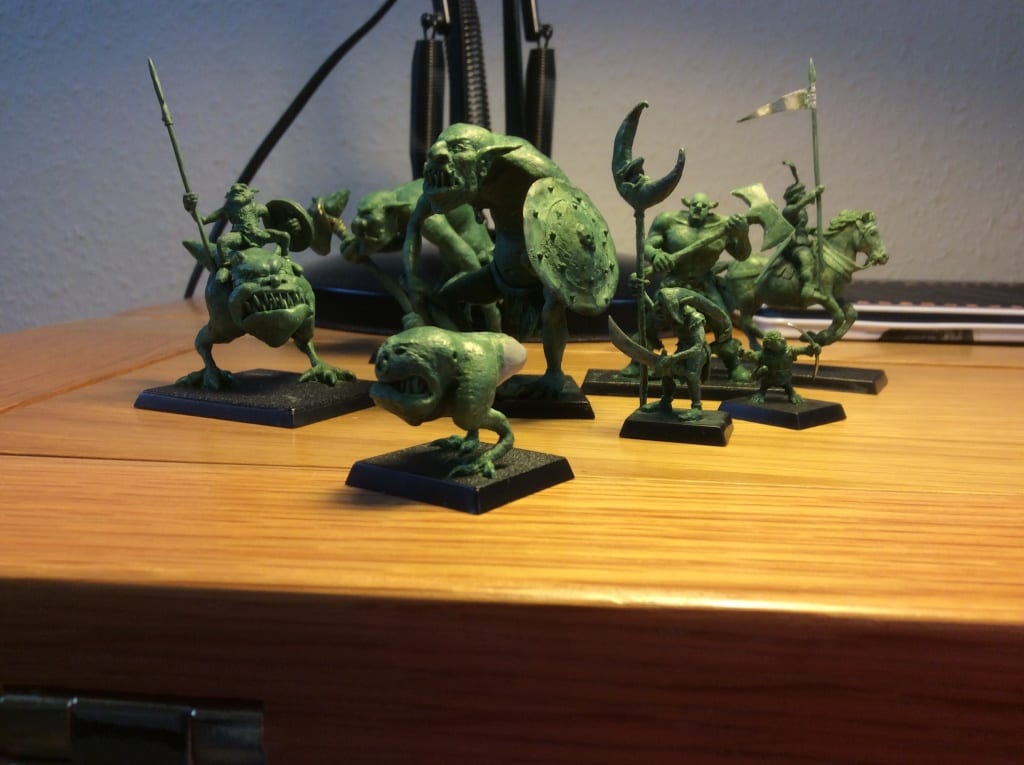
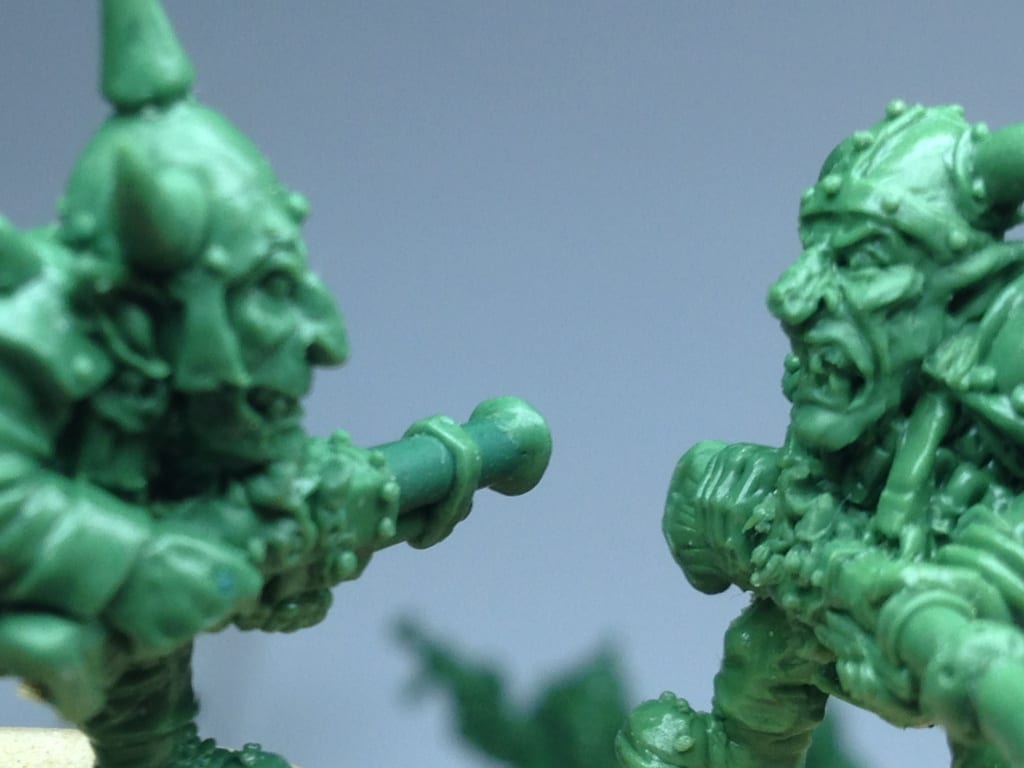
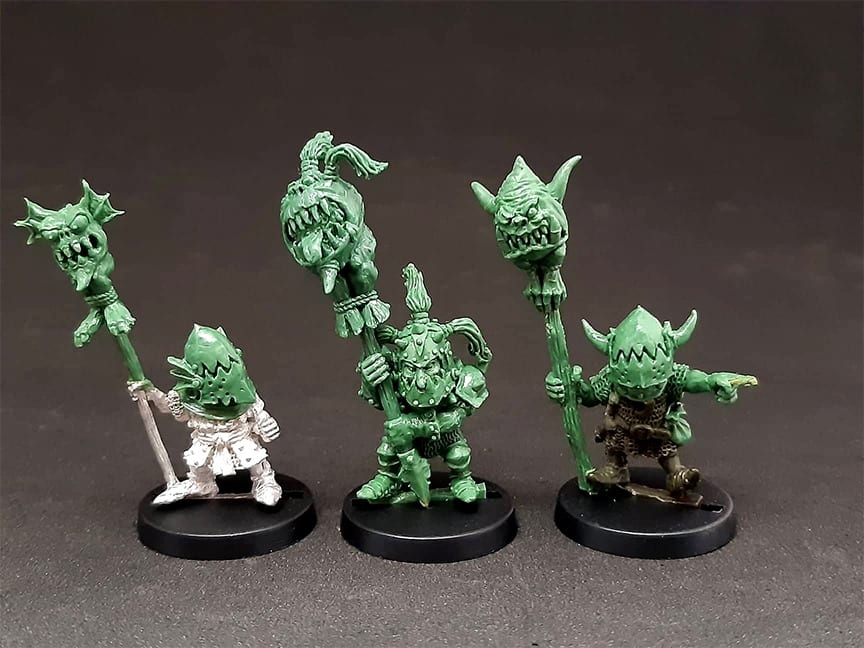
His goblins, orcs and other fantasy creations have taken on legendary status over the course of a near-40 year career. And yet even a man as talented as Kevin ‘The Goblin Master’ Adams describes using Green Stuff in the middle of a heatwave as “sometimes maddening”.

Green Stuff is formulated to be sticky. Its stickiness, malleability and penchant for holding the finest of details is what makes it so popular. It is an epoxy modelling putty which takes time to get used to and can be difficult to work with even in winter – so imagine what it is like in 30°C heat.

“Working with Green Stuff in high temperatures is something that has to be mastered,” says Kev. That starts the minute you take it out of the package and begin kneading the yellow and blue parts together, at which point it can already be sticky enough to want to adhere to everything it comes into contact with.

“Mixing Green Stuff without it coating thumb and fingers can be avoided by wetting them beforehand. I use a damp sponge from a blister pack, and dip my sculpting tools in as well to avoid the putty sticking to them. That is one thing I would definitely recommend.”

The recent hot weather has seen Kev undertake new measures to reduce the temperature at his work bench. “I have started using an air cooler on the side of the desk. It has a top tray which can contain ice water and I aim that at the putty I have mixed. It keeps it fresh, less sticky and prolongs the curing time.”

Even with Kev’s new cooling system, he still has to take a more delicate approach when using Green Stuff in summer. “It needs a much lighter touch than usual. Trying to roll it on my Formica desk is impossible, it just smears and won’t roll. The smallest parts are the most difficult. Rolling tiny balls for rivets and they just smear on fingers.”

“Perseverance is ultimately the name of the game. It is not impossible, just challenging. You spend longer working as you can only make smaller parts due to the faster curing.”

“In winter, I will make a dolly from copper wire and model the legs and upper body in one go as the putty is workable for two hours. In the summer, you struggle to even get the legs done due to the putty curing quickly.”

“I think it is a case of having to adapt to the heat to be honest. If I don’t make any models, then I don’t have any money. It’s as simple as that.”

Heat to overcome the heat for Magic Sculp

Magic Sculp is a much easier epoxy modelling putty than Green Stuff to shape, manipulate and work with in the heat of summer. It cures to a cold, hard feel like ceramic.

That makes it much less sticky. Sculptors wanting an ultra-smooth finish should be wetting the putty as they go, and Kev has already pointed out the benefits that can bring in hot temperatures.

The biggest impact that heat has on Magic Sculp is to speed up the curing time. Having spent many years living and working in the United Arab Emirates and Qatar, Paul Wade is no stranger to dealing with hot temperatures. Even a roasting British summer pales into comparison to the 49℃ he would regularly experience in the Middle East.

It was his time in that part of the world that inspired Paul to set up Red Zebra, a military scale model company which focusses on wars from the Middles East rather than more mainstream conflicts like World War II.


He also learnt whilst living in Doha a trick for extending the cure time of Magic Sculp. This may come as a little bit of a surprise, but Paul says the secret to overcoming heat is to use more heat.

“When I can feel my Magic Sculp getting slightly harder and beginning to cure before I have fully worked it, I heat it with a hairdryer for a few seconds. The small blast of artificial heat actually softens it, giving you an extra bit of working time. If you use a hairdryer on it for too long it will start to cure faster, though.”

Paul also uses casting resin to create copies of his masters. Like putties, resins will also cure quicker in a heatwave. His advice for casting and moulding in the summer? Start early!

“When it is really hot, it is not unknown for me to be out there at 5am in the morning casting. By the time it gets to 9am, I have to stop for the day. I used to keep polyurethane resin in a small fridge, thinking that it would help maintain the cure time. When that fridge gave up, I did not replace it and kept my resins at room temperature. I never really noticed any difference.”

Epoxy modelling putty in the fridge – effective or an old wives’ tale?

Ah, the infamous fridge question. One of the most frequent enquiries we get asked during the heat of summer is whether putting epoxy modelling putty in a fridge or freezer can make a difference.

Who better to ask than Kev and Paul whether storing Green Stuff and Magic Sculp between a cucumber and a bottle of mayonnaise is a worthwhile exercise or an old wives’ tale?

Neither seemed particularly enamoured by the idea. Paul responded with: “I wouldn’t resort to putting Magic Sculp in the fridge, no.” Kev meanwhile said: “Putting Green Stuff in a fridge is not worth the bother. By the time you have taken it out and moved it to your desk, it is going to have warmed up anyway.”


Kev though did have one piece of advice involving Green Stuff and a household appliance. “Occasionally, I get called by my partner for dinner when I am in the middle of a model. If I have not finished a bit of detail, I put it in the freezer and it keeps it in limbo for when I get back.”

“With really delicate detail, I will sometimes put Green Stuff in the freezer first. It means the putty is very stiff for the first five minutes, which is great for doing teeth and eyes.”

Milliput also advise that their putties can be put in a freezer should interruptions occur when working with them. The freezer will keep the products at the same cured state for up to 36 hours. When you are ready to resume work, remove the Milliput, warm it with hands, and it is ready to use again.

Related Products


Related Articles

Posted on 12 Comments

Epoxy modelling putty – Your guide to model making & sculpting putties

Selecting the right epoxy modelling putty from the large number available can be a difficult task with each model making putty having its own unique properties

Judging by our inbox, the world of epoxy modelling putty can be confusing. One of the most frequent enquiries we get is to explain the difference between the various model making and sculpting putties available and which one is most suitable for a specific application.

Green Stuff, Magic Sculp, Geomfix, Milliput… there are a lot of options. The rather unhelpful answer is that most of the time, choosing an epoxy modelling putty comes down to personal preference. Some will find the stickiness of Green Stuff easier to work with; others the smooth texture of Magic Sculp.

It is rather like pizza toppings. Everyone has their favourite and there really is no wrong or right answer…. even pineapple is acceptable. Before we end up talking too much about pizza and I end up going to Dominos for lunch, let us get back to the subject at hand – model making putty.

Whilst a lot depends on which putty you get along with best, there are some differences between epoxy modelling putties that you can take into consideration when deciding on your sculpting medium of choice.

Welcome to the SylCreate guide to selecting the right model making putty.

Green Stuff

Green Stuff is often the preferred epoxy putty of wargamers. It is flexible and gives a fine cut, making it ideal for adding intricate details to goblins, orcs, and other fantasy creatures.

For highly-detailed Warhammer, Dungeons & Dragons and other fantasy work, it is perfect. Some of the world’s leading model makers such as The Goblin Master Kevin Adams and Alan and Michael Perry of Perry Miniatures are Green Stuff devotees.


When working with Green Stuff, it is noticeable just how sticky the putty is. It can take some getting used to. This stickiness allows the cured putty to retain a degree of flexibility, enabling the user to bend it into shape without it breaking.

These elastic properties make Green Stuff popular with scale model enthusiasts and professionals as well as wargamers. Whilst scale model makers will use a firmer epoxy modelling putty like Magic Sculp for initial sculpting or conversions, more detailed items can be made with Green Stuff, bent and then glued onto the other cured putty.

Award-winning AFV modeller David Parker deploys this technique for adding detailed insignia and supporting accessories such as belts and hair to his tank crew.

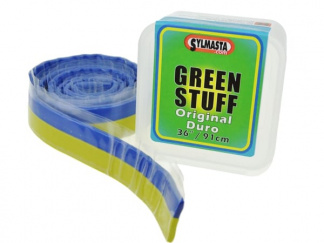
Green Stuff comes in two formats; a reel and a stick. The reel is pre-formatted with the resin and the hardener combined. To use, you simply cut off the amount of putty required and mix it together until it turns green.

One downside of the reel format is it does not allow the user much control over the mixing ratio of Green Stuff. That is not the case with the stick, where the resin and the hardener are separate portions.

The recommended mix of Green Stuff is 50-50, but in more specialist applications there are advantages to be had from adjusting these quantities. Professional model makers will sometimes go as far as to use four or five parts yellow to one part of blue hardener.

Less hardener means a longer curing time than the standard of 90 minutes to 1 hour and a much lighter consistency of putty, allowing for more time to work with a material capable of holding even more detail.

For more guidance on using Green Stuff, then Kneadatite have written a handy guide on their website with everything you could ever want to know about using the putty.

Magic Sculp

Magic Sculp has a finer texture and a softer consistency than Green Stuff, making it easier to sculpt in larger projects.

It is much more clay-like and once cured, it can be sanded, carved, painted… you could even attack it with a grinding tool and it would not break or lose shape.


Whereas Green Stuff is used mainly by wargamers, Magic Sculp has multiple uses. It is popular in the scale model world for easily converting existing models, gap filling and sculpting new models and accessories.

Sculptors like it because of how easy it is to carve and the smooth finish it provides. They use it to repair and restore existing pieces as well as for creating new pieces.

In one of our favourite applications, it has even been combined with brick dust to create a coloured putty which seamlessly repaired a large hole in a brick wall.

Another reason Magic Sculp is popular for larger projects is its work time. At room temperature, it will not cure for two to three hours, offering much longer for model makers and sculptors to carve and shape the putty in larger projects.

Geomfix Original A+B Epoxy Modelling Putty

The best way to describe Geomfix Original A+B is as a cross between Green Stuff and Magic Sculp.

It can hold the finest of details like Green Stuff, allowing it to be used for intricate work. At the same time, it has a tough surface similar to Magic Sculp for building up bulk models and use in restoration work.


Geomfix’s secret is that it is ceramic filled. This allows it to set harder than most other epoxy modelling putties, giving it a ceramic feel which makes it perfect for restoring china and other materials.

The list of users of Geomfix Original is pretty extensive. Scale model makers, wargamers, arts and crafts enthusiasts, china restorers, doll repairers and jewellery designers all use it.

Away from our world of creativity, a super-strength, industrial version of the epoxy putty known as Sylmasta AB is used in maintenance and repair tasks.

If you are unsure whether Green Stuff or Magic Sculp are the epoxy modelling putty for you, then Geomfix is a versatile, happy-medium between the two.

It has a two hour work time which can be accelerated using heat, is available in bulk quantities for the biggest projects and comes in three colours – standard white, jet black and silver grey.

Geomfix Coloured Epoxy Modelling Putty

The colour options do not end there. Geomfix is also available in a further 25 colours which match Swarovski crystals.

Originally, Geomfix Coloured was manufactured as a jewellery epoxy putty but the concept quickly grew into other areas including antique restoration, large design projects, and creating seasonal items sich as Christmas crafts and decorations.


Geomfix Coloured is made-to-order on-site by SylCreate. As well as the standard 25 colours, our technicians can customise an epoxy modelling putty to a specific colour.

When Donald Trump was in the White House, we were even asked by one customer to produce a Trump-coloured epoxy putty. The result was surprisingly accurate – although we never did ask what the putty was for…

Milliput

Millliput have been manufacturing epoxy modelling putties from their base in Wales since 1968, earning a deserved reputation as one of the best in the business.

All Milliput putties follow the same format – they come in two parts, 56.7gm of resin and 56.7gm of hardener. Mix the two together and off you go, whether your application is repairing a cracked toilet, fixing a leaking radiator, woodturning, or sculpting coal for a model railway.

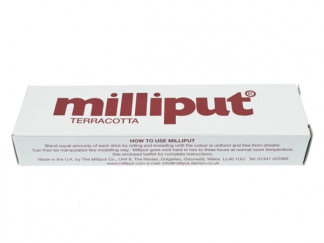
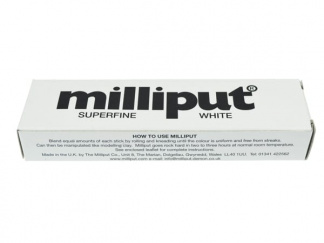
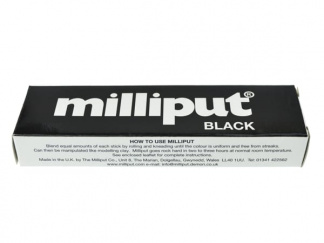
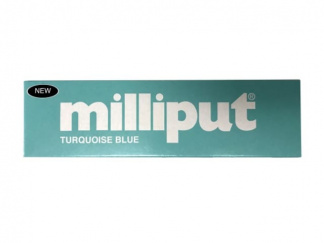
There are six colours of Milliput available. Standard sets to a yellow-grey with the others doing exactly what they say on the tin: Silver-Grey, Superfine White, Black, Terracotta and Turquoise Blue.

Because Milliput is as much of a repair putty as it is a model making epoxy, it is not great at holding the finer details which most scale model or wargamers require when sculpting.

Where Milliput is good is in price – it is by far the cheapest epoxy putty around, making it a popular choice when it comes to packing out the body of large-scale models.

Surprisingly few model makers seem to know this, but you can mix modelling putties together to combine their properties. It is here where Milliput shows its worth.

For larger model making projects in which greater quantities of putty are required, Milliput can provide bulk in a more cost-effective manner.

Mix it with Green Stuff and you create a putty which can be used to build up a model and offers a degree of Green Stuff’s flexibility and ability to hold intricate details.

You can find out more about the benefits of mixing modelling putties in this article we wrote on the subject.

Superfast Wood Stick

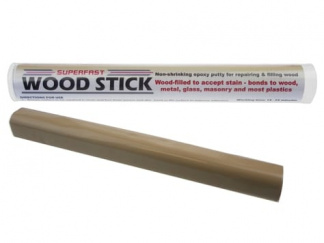
Last but by no means least on our list is Superfast Wood Stick, an epoxy putty specially formulated for wood repair and restoration.

The putty is wood-filled and cures to the colour of wood, allowing it to be used as a damage filler. It repairs fences, furniture and wooden sculptures and the cured putty even floats.

Since bringing it into the SylCreate range, we have seen customers start to use it to carve brand new wood-like ornaments and creations.

Superfast Epoxy Putties do not stop with wood, either. There are specialist putties for the repair of other materials including concrete, which we have recommended to several customers carrying out restoration on stone materials.

If you have any projects completed using our modelling putties which you would like to share with us, then please email photos and a write-up to sales@sylmasta.com.

Posted on Leave a comment

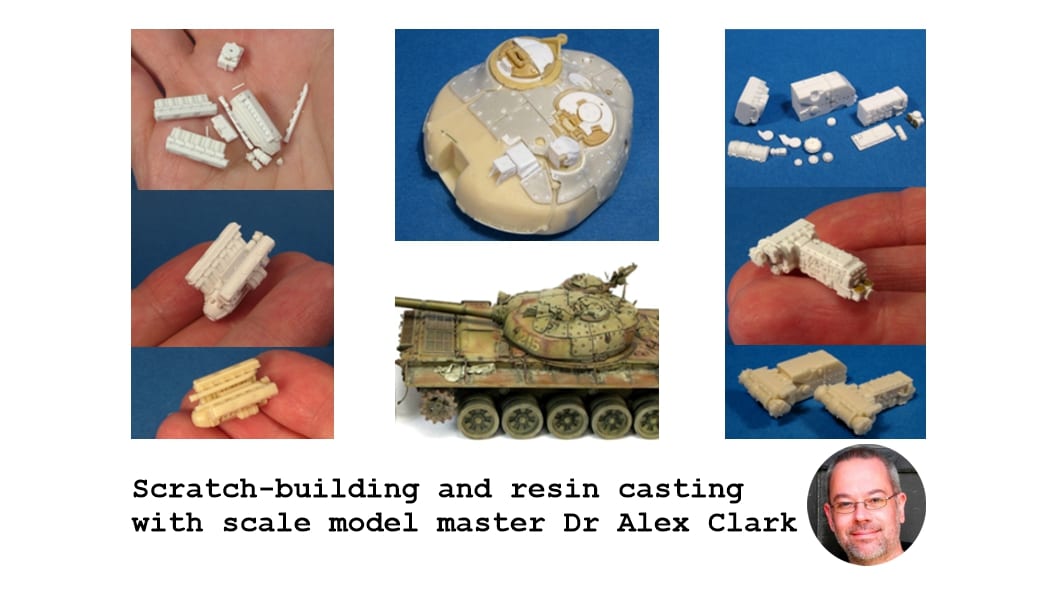
Scratch-building and resin casting with scale model master Dr Alex Clark

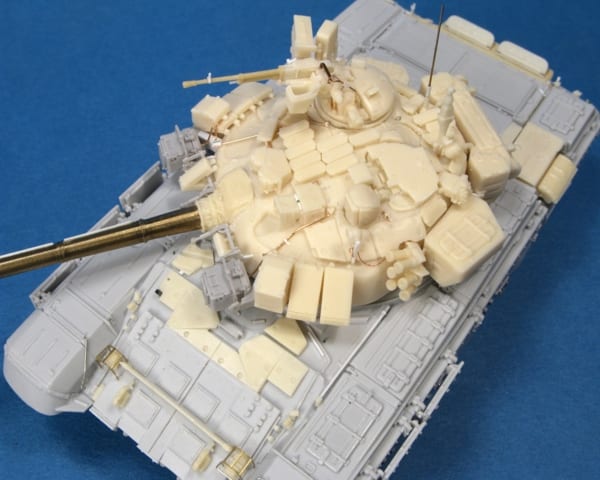
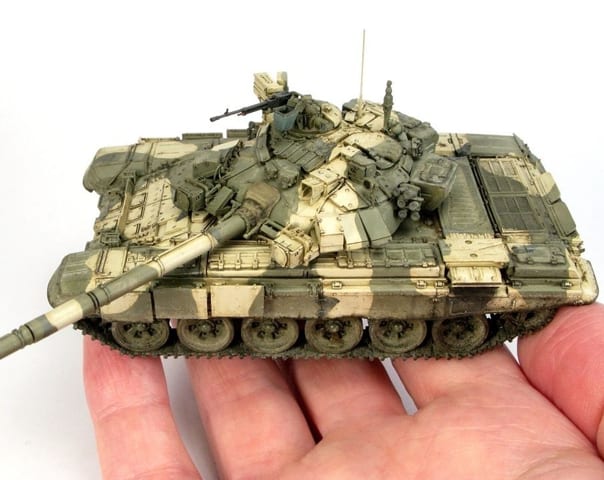
Alex Clark is one of the best 1/72 scale model makers around thanks to his talent for scratch-building parts from Magic Sculp and using casting resin to produce high-quality reproductions

Dr Alex Clark built his first scale model as a young boy in the 1970s and since then, he has become a master of the art of resin casting, mould making and scratch-building – with the awards to prove it.

He was conquered national competitions within the United Kingdom and international shows in the United States and Spain, including Euromilitaire, AMT Torrent, and the IPMS USA Nationals.

He has had three books published on the casting and scratch-building process and written articles for many magazines, including the first ever issue of the popular AFV Modeller, edited by another star of our Showcase Section, David Parker.

All model makers go through a journey, discovering what they enjoy and what they are good at after having a go at the many different spheres which make up the pastime.

Dr Clark is no different. He went from putting scale model kits together to scratch-building and resin casting his own parts and accessories to becoming one of the best at 1/72 scale AFV models there is. Oh, and he has a chemistry PHD too, hence the doctor.

“Back in the 1970s, I would build all sorts,” Dr Clark explains as he takes up his story. “Aircraft, armoured vehicles, ships, cars and more. Over the years, I gradually settled around armoured vehicles, mostly in smaller scales such as 1/72nd.”


As Dr Clark discovered his calling for 1/72 in his early twenties, he began to read up on the vehicles he was now recreating. What he discovered was a lot of the kits he was building were nothing like the full-size machines they reputed to be.

“As I delved more into research and the details of the real things, I became increasingly dissatisfied with the quality and accuracy of some of the available kits.”

“To this end, I started scratch-building my own details. Inevitably, I reached a point where I needed multiple copies of some parts, which is when I took my first step into the world of mould making and resin casting. Since then, I have never looked back.”

We often find when resin casting that the simpler you can keep the process, the better the result. Dr Clark’s ridiculously detailed work is evidence of that. “To this day I don’t have any specialist casting equipment, I make everything with simple one-part, open moulds,” he proudly says.


Dr Clark uses the most basic of resin casting and mould making materials and tools to recreate his scratch-built parts – and it was his mission to show other scale model makers that you do not need any expertise to start casting that led to him writing his three books for Osprey Publishing.

“My first two books dealt with building specific vehicles – Modelling the Tiger Tank in 1/72 Scale and Modelling the Panzer IV in 1/72 Scale. The third book, Small Scale Modelling Masterclass, has chapters devoted to scratch-building.”

“This also covered basic mould making and resin casting for beginners. Being an enthusiastic amateur, I wanted to show that any modeller can start casting themselves, just as I did.”

Small Scale Modelling Masterclass is a bible for beginners when it comes to everything to do with scale model building, taking readers through construction, painting, finishing and presentation.

In it, Dr Clark explains how he scratch-builds parts and then uses casting resin and moulding rubber to produce highly-detailed recreations which are good enough to wow at competitions across the globe.


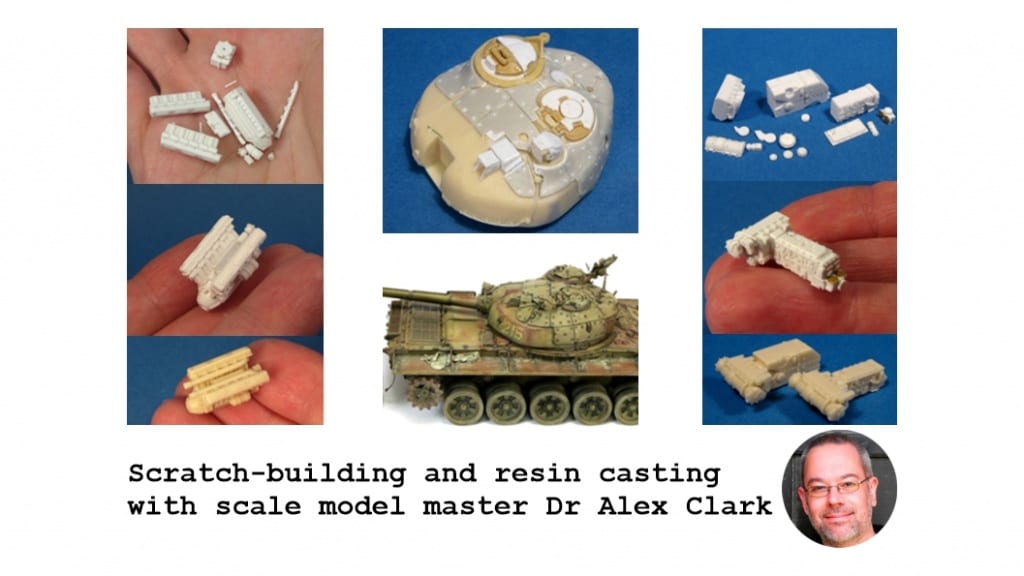
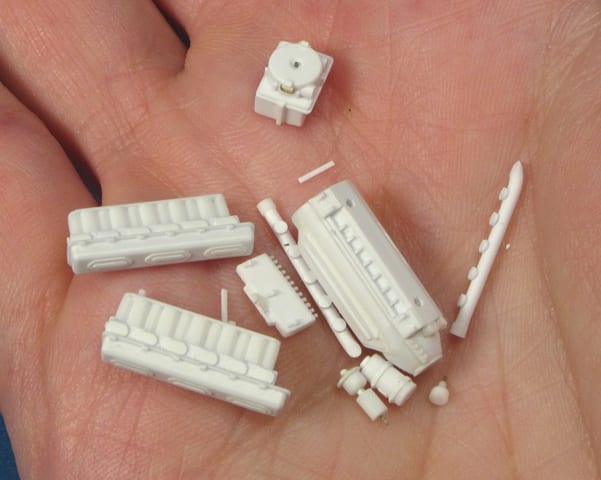
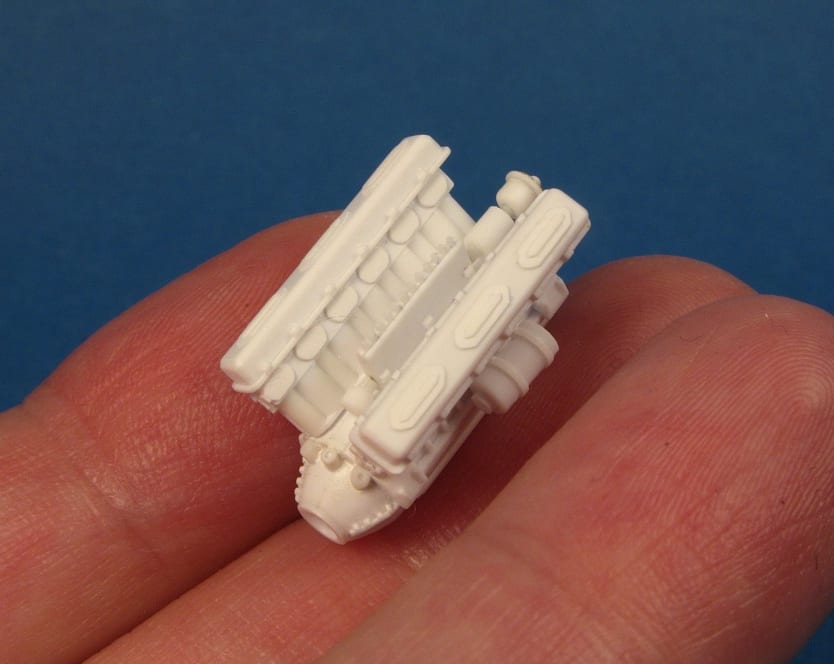
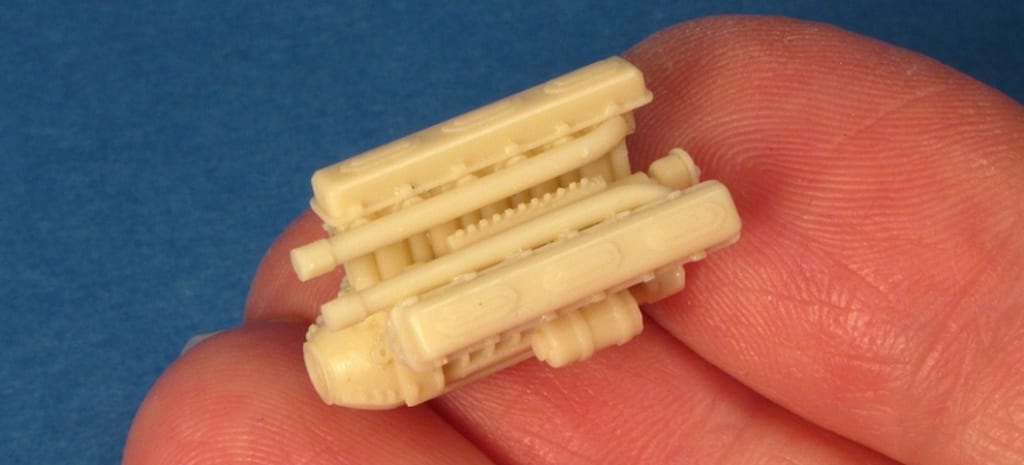
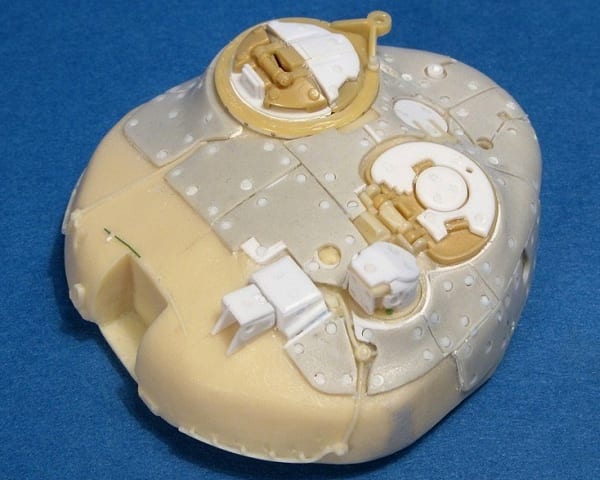
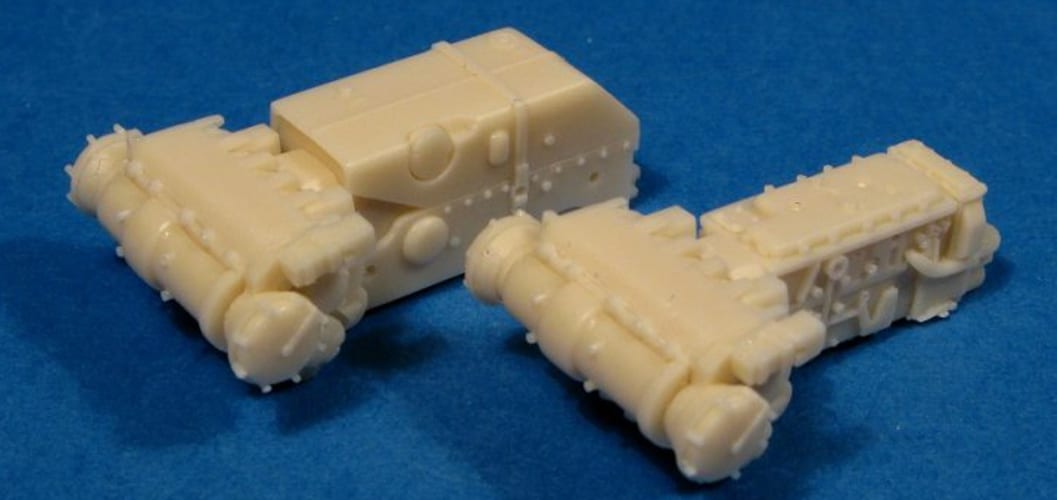
A scale model T-54 tank engine made from separate parts cast in resin and assembled together
The two photos above show parts for a T-54 tank engine scratch-built by Dr Clark. He then cast the parts in resin and assembled them

“My favourite tools for scratch-building are Magic Sculp and a Swann-Morton scalpel with 10A blades,” Dr Clark says – without giving too much away from the book, obviously!

“Magic Sculp is the best type of modelling putty for making stowage, like tarps and rolled blankets. It rolls very easily into thin sheets without tearing and gives realistic and natural folds and creases.”

“A scalpel has been my preferred cutting tool for nearly 35 years. Swann-Morton with a number 10A blade is perfect for the small, intricate parts I create.”


When it comes to casting and mould making, Dr Clark has been using SylCreate’s resin casting kits for 15 years now in his scale model work. “Grade 380 Silicone Moulding Rubber has just the right degree of strength and flexibility for the small, detailed parts I make.”

“To partner this, Polycast G27 Resin cures in an ideal time. It is enough time to work it into the moulds, but then not too long as to hold up projects. I also like the sharp and crisp results it gives, they are perfect!”

“A humble cocktail stick is enough to work the resin carefully into the details and remove any air bubbles. Much can be achieved with this approach and I believe it is within the scope for any modeller to do the same if they wish.”


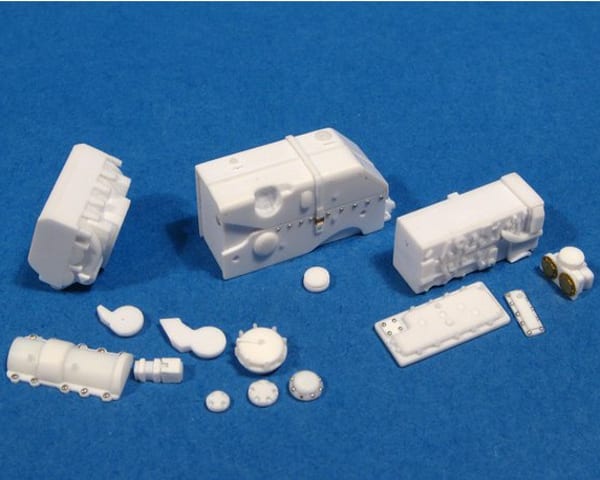
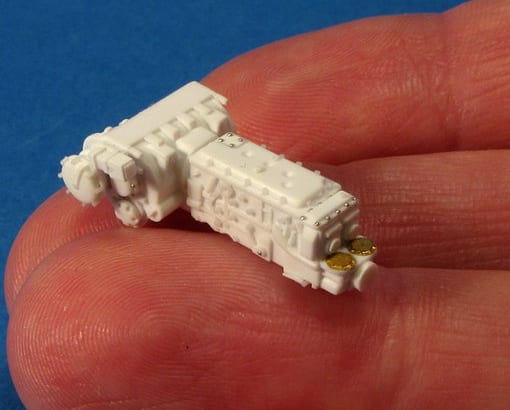
Transmissions for a 1/72 scale Tiger II tank made using casting resin
The transmission of a Tiger II tank. Dr Clark scratch-built the parts, test assembled them and cast them using G27 resin

Dr Clark’s attention to bubbles is clear throughout the casting process. Rather than dispense the Silicone Moulding Rubber straight into the mould box, Dr Clark coats each part in a layer of the liquid rubber first before slowly pouring the rest of the rubber in. This helps to eliminate air bubbles which can otherwise form.

It is the same story when it comes to the resin. Dr Clark describes getting the resin completely into the mould without any bubbles as “the biggest challenge of the whole process.” Again, he turns to a brush, painting the resin into the most detailed parts of the mould and jabbing it gently so that air bubbles rise to the surface.

The results are award-winning models and a loyal following. Dr Clark’s public Facebook profile is followed by thousands of people who like, love and share his regular updates of projects he has been working on.

If you like scale models, resin casting or are looking for inspiration for your next project, then give him a follow. It is always a thrill to see a master at work.

Dr Alex Clark’s three books on scale models are available to buy from Osprey Publishing.


Posted on Leave a comment

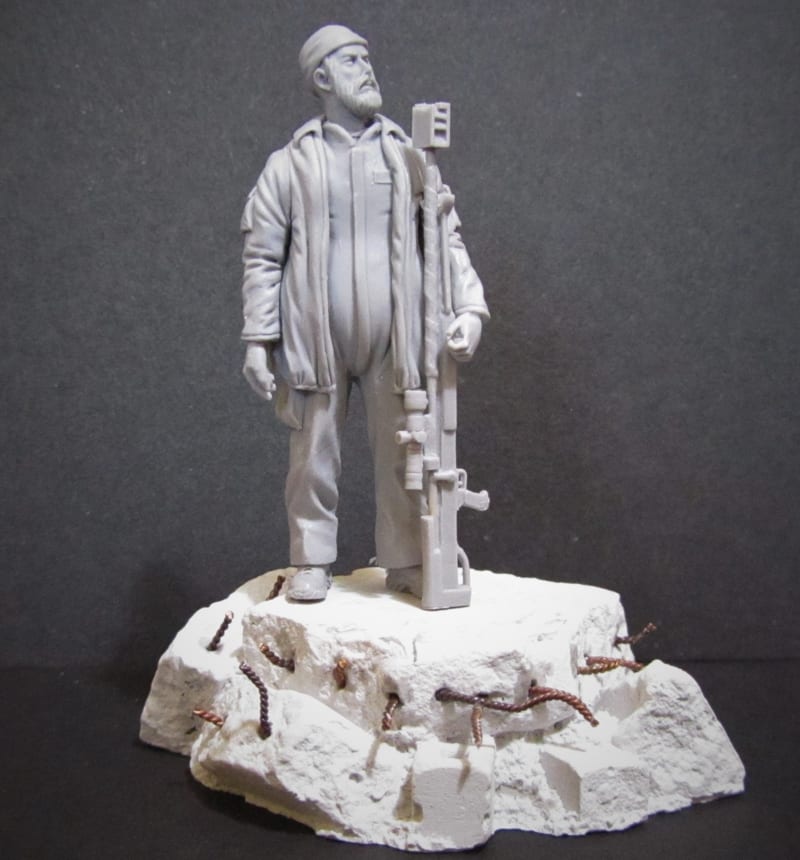
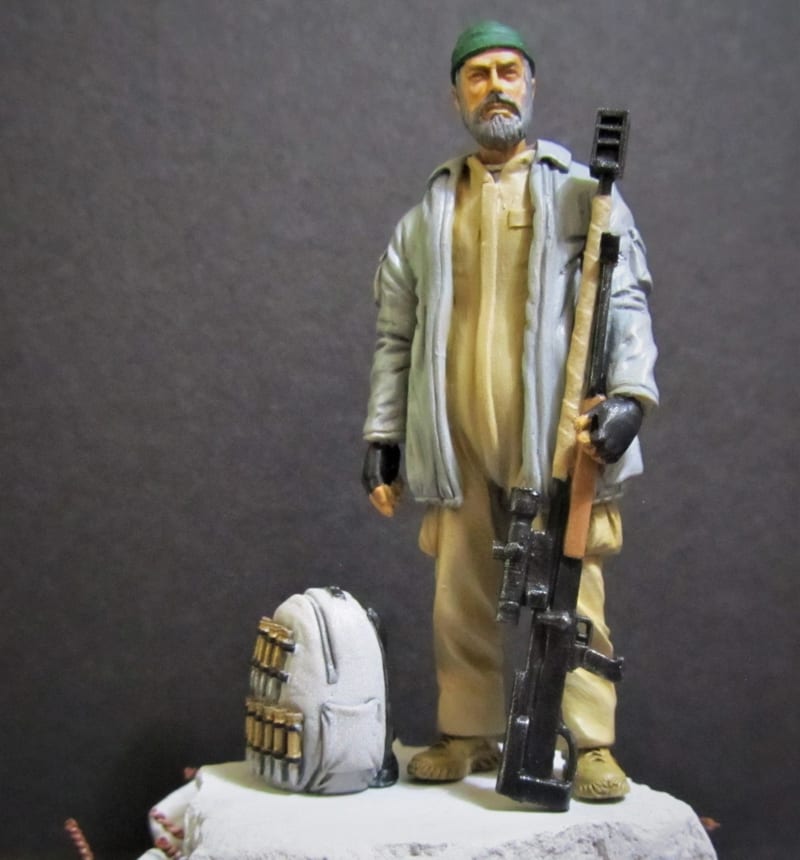
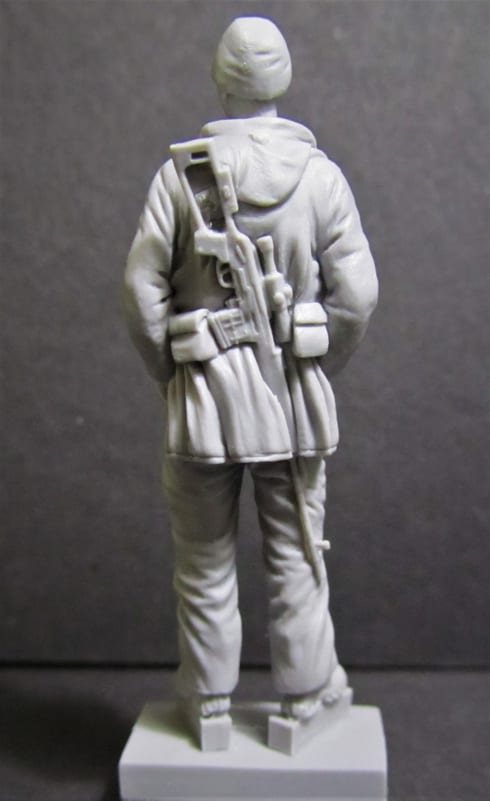
The real life snipers who fought ISIS immortalised in Magic Sculp

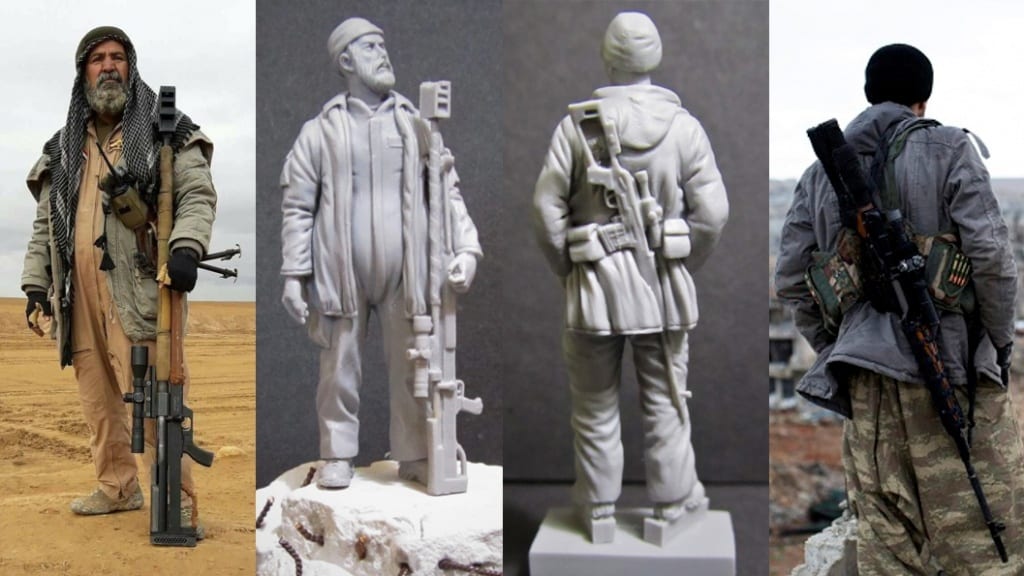
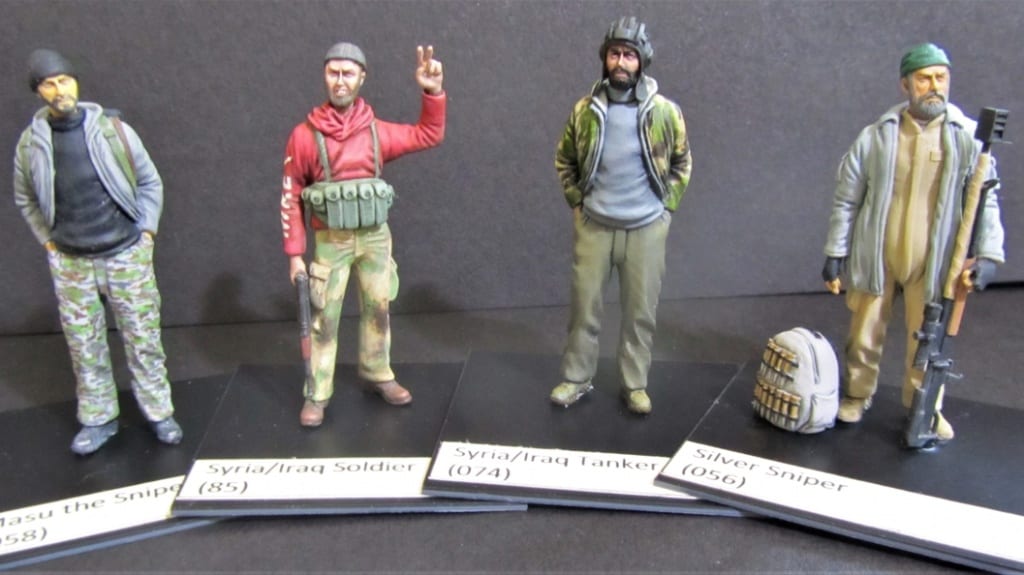
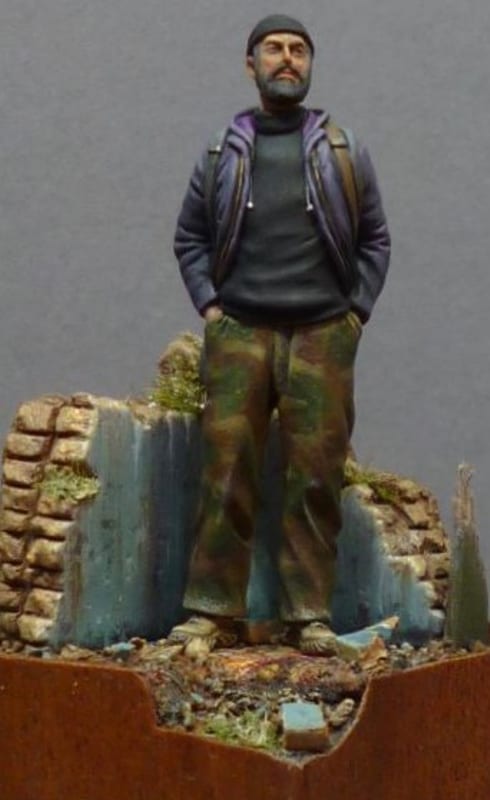
Legendary snipers who fought against ISIS in the Iraq-ISIL War have been sculpted in Magic Sculp by Red Zebra

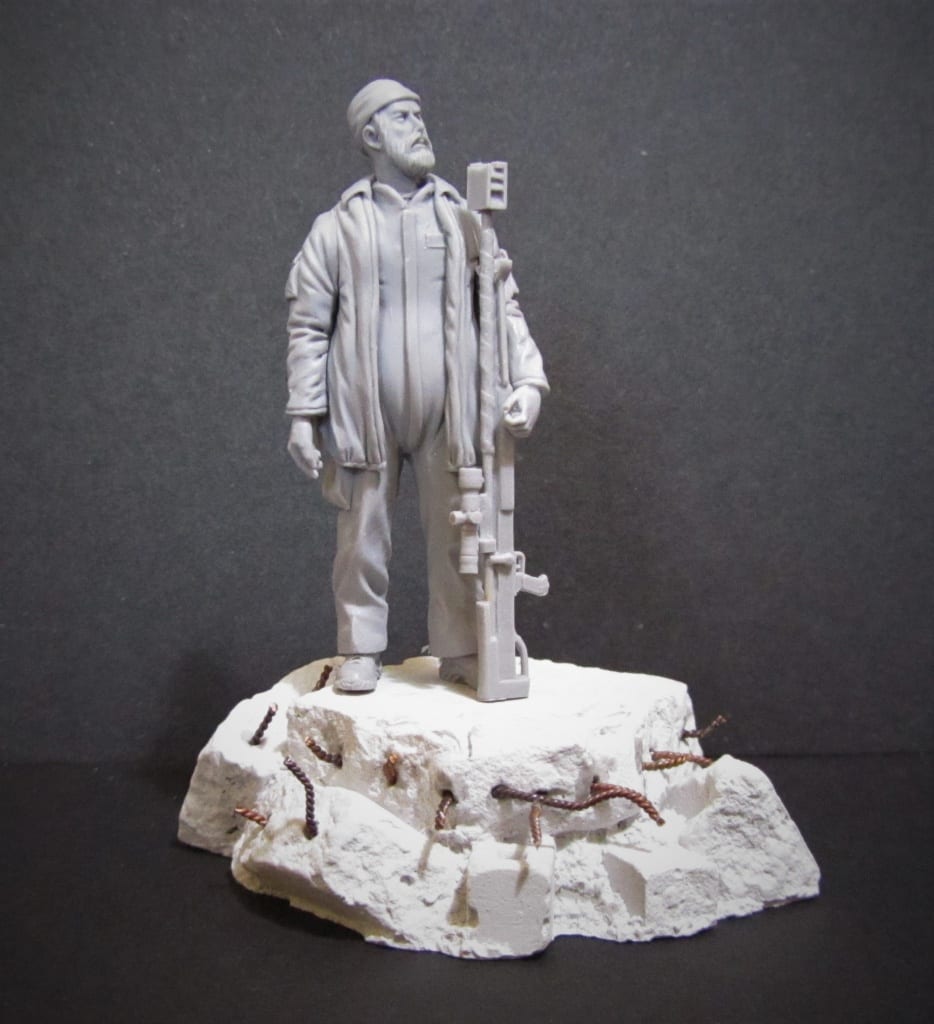
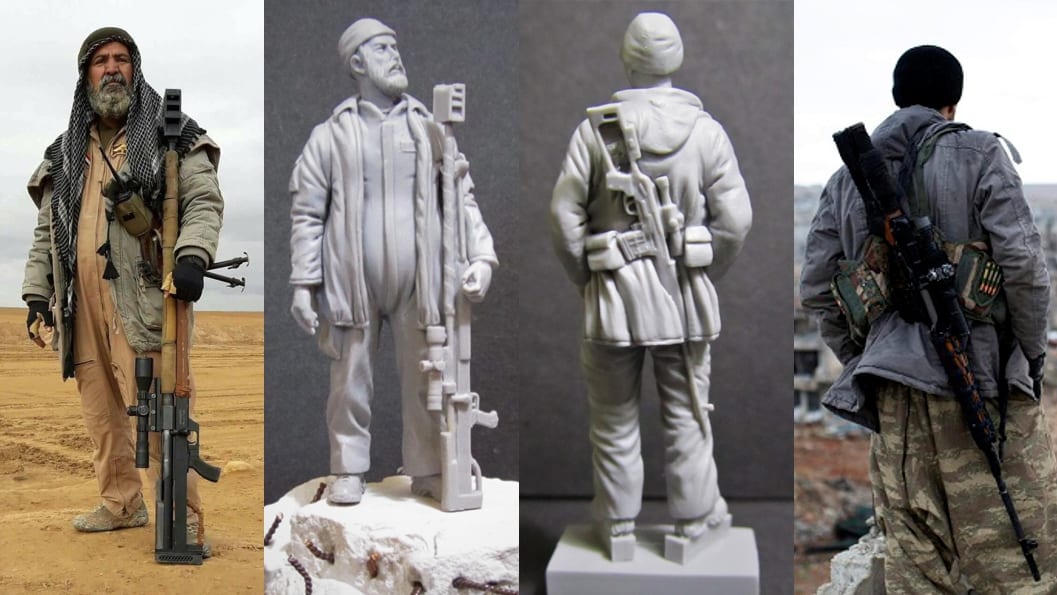
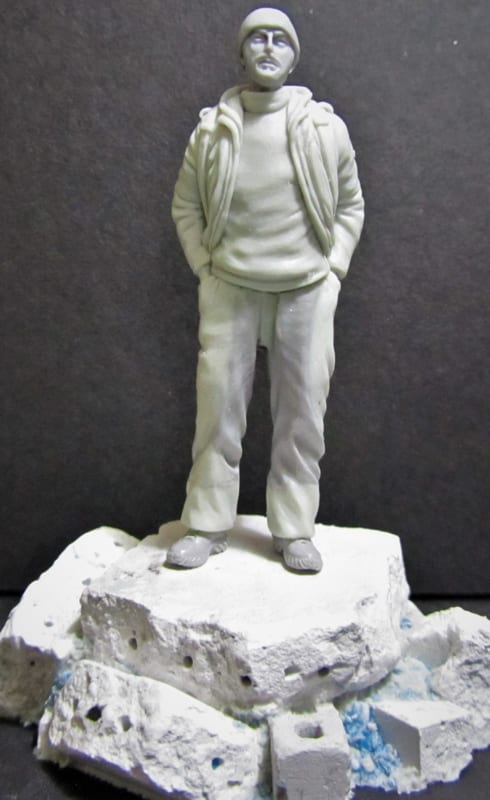
At first glance, the two figures sculpted from Magic Sculp in 1/35th scale look like a couple of men casually standing on a street corner – you certainly would not have them marked out as two of the world’s most deadly snipers.

They have their hands in their pockets, as if they are doing nothing more than watching the world go by. It is only when you notice the sniper rifle that you realise these two are anything but civilians.

Abu Tashin al-Salhi and Musa Hardem were in fact feared snipers who fought against ISIS in the Iraq-ISIL War, which raged between 2013 and 2017.

Their feats earned them legendary status in both their home country and across the globe – which is what led Red Zebra Models some 2,717 miles away in the United Kingdom to immortalise al-Salhi and Hardem in Magic Sculp before and polyurethane casting resin.

Regular readers of our Showcase page need no introduction to Red Zebra. They are the military modelling company who specialise in figures and accessories from Middle East conflicts and desert warfare.

It says much that even in a range as intriguing as Red Zebra’s, al-Salhi and Hardem stand out. Which is what made us want to find out more about the process and inspiration behind recreating al-Sali and Harden in Magic Sculp – as well as the incredible life stories of these two snipers.


Abu Tashin al-Salhi was a sniper who fought against ISIS in the Iraq-ISIL War

Abu Tashin al-Salhi

Abu Tahsin al-Salhi first came to the attention of Red Zebra when owner Paul Wade discovered a photo online whilst carrying out research into recent conflicts in Iraq and Syria.

“I came across a photo on the internet of what appeared to be an old man in a boiler suit holding a large rifle. I was curious to learn more about this man and after some research, discovered the incredible story behind the figure.”

For al-Salhi was more than an old man in a boiler suit. He was  one of the most feared snipers in the Middle East having taken part in conflicts in the region dating all the way back to the 1973 Yom Kippur War, earning the nicknames “The Sheikh of Snipers” and “Hawk Eye” over the course of his 44 year military career.

Much of al-Salhi’s story cannot be verified, not helped by his status as a mythical figure among Iraq’s Shiite community.

From what we know, al-Salhi was born in 1953 and travelled to Kuwait as a young man, where he worked as a shepherd of cows and camels. For protection, he carried a French rifle which he also used for hunting rabbits.

In the early 1970s, al-Salhi swapped shepherding for sniping. He was sent to a Russian sniper school in Belarus shortly before joining the Iraqi army.

After serving in the Golan Heights during the Yom Kippur war, he saw action in the 1974 Second Iraqi-Curdish War, the 1980-88 Iran-Iraq War, Saddam Hussein’s 1991 invasion of Iraq, the Gulf War, and the US invasion of Iraq in 2003.

Al-Salhi came out of retirement in 2014 to join the Popular Mobilization Forces militant group in the fight against Islamic State after the terrorist organisation seized vast swathes of Iraq.


It was during his time fighting ISIS that the photo of al-Salhi was taken, inspiring Paul to sculpt his first snipers model using Magic Sculp and a small amount of Green Stuff.

In it, al-Salhi can be seen with his trusty Austrian-made rifle. With this piece of weaponry, he killed 384 ISIS fighters according to the Popular Mobilization Forces, including four on the day he died as part of an advance to retake the town of Hawija in September 2017.

His rifle was given pride of place in a museum in Karbala following his death. Al-Salhi was celebrated across Basra and other Shiite areas as posters with his face adorned homes and shops, poems were written in his honour and a bakery even started selling cakes with his face on.

Thanks to Red Zebra, al-Salhi will live on through his own military figure. “Although I’ve sculpted a lot of figures over the years, they all tended to be more regular soldiers,” Paul said. “The look of this man certainly appealed as something completely different.”


Musa Herdem was a legendary sniper who fought against ISIS in the Iraq-ISIL War

Musa Herdem

It was whilst trying to get information on al-Salhi that Paul came across another photo from the fight against ISIS.

“It was a soldier stood on the parapet of a building, looking out over the ruins. He was stood there with his hands in his pocket and his rifle flung over his shoulder. Obviously, his job was complete.”

The soldier in question was Musa Herdem, an Iranian-Kurdish sniper who garnered worldwide recognition when it was revealed that he had successfully killed ISIS fighters from a distance of 400 metres using his Russian-made Dragunov rifle.

Herdem’s reputation was further enhanced when he became the subject of a profile carried out by an Iranian-Kurdish AFP photographer during the Battle of Kobane in Syria.

Pictures of Herdem were widely circulated among the international press, including the one that inspired Red Zebra to investigate his story.

Herdem was born in Rojhelat and grew up in Salmas, a city near Iran’s border with Turkey. Salmas is a melting pot of cultures, home to Azeris, Armenians, Assyrians, Kurds, Jews, and Persians.

He spent his childhood working as a kolbar, somebody who is paid to smuggle goods on their back across the border of Iran and Turkey. It is a dangerous way to make a living, with many kolbars shot dead by government forces when crossing the border or dying due to the treacherous journey over mountains in freezing conditions.

Herdem survived though and in 2012, he joined the Syrian Kurdish YPG at the age of 23. When ISIL captured 350 Kurdish villages and towns surrounding Kobani in September 2014, it was Herdem who helped lead the fightback, earning the nickname Musa the Sniper along the way.


He fought in Kobani from the first day of the siege until the last. From September 2014 until January 2015, he moved from ruined house to ruined house killing as many ISIL fighters as possible. Herdem is credited with hundreds of kills.

When he was not taking out targets, he was training other snipers to be just as effective as he was through his role as commander of the Kobani Sniper Group.

Herdem was killed in action in April 2015. Just a couple of months before his death, he gave an interview in which he talked through the Battle of Kobani while pointing at the bodies of nine ISIL fighters who he had dispatched.

This casual attitude to war appealed to Paul. “Just as with Abu, I liked the idea of the relaxed casual pose. Once I found out some history about Masu, I just had to sculpt this individual.”

The figure of Herdem features him in his signature pose, casually leaning up against a ruined wall with his Dragunov rifle strapped to his back. As with the model of al-Salhi, Magic Sculp and Green Stuff were used to sculpt Herdem, this most feared of snipers.

Masu the Sniper and Silver Sniper, Abu are both available to buy as part of the Red Zebra 1/35th Scale Range.


Posted on 1 Comment

How to turn modelling putty into a material for brick restoration

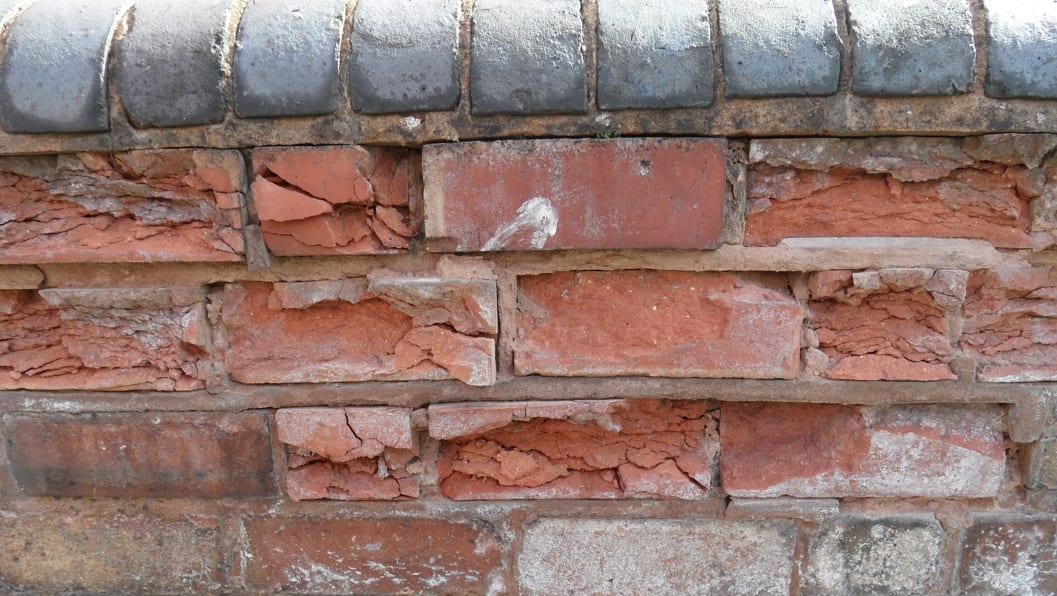
Brick restoration can be carried via the use of epoxy putty and is requried when brickwork becomes damaged through lime blow

Brick restoration. Not something we at SylCreate had tried much of before, but when a customer came along wondering whether our modelling putties could help repair damaged brickwork, we decided to give it a go.

It was a good thing we did as it showed us a whole new side to Magic Sculp. We already knew that it is great for model making and sculpting, and now we can add brick restoration to its list of applications. You really do learn something new every day.

The beauty of this restoration was in its simplicity. The customer was looking to repair several bricks which had been damaged through lime blow. They wanted to fill in the cracks, holes and missing chunks using a putty which would blend in seamlessly.

Lime blow occurs when clay bricks contain small amounts of lime. When the clay is fired, the lime is converted to calcium oxide – also known as quicklime or burnt line. When calcium oxide mixes with water, it begins to slake in a highly vigorous process.

So vigorous in fact that quicklime has been used as a weapon throughout the centuries. In 80 BC, the Roman general Setorius used choking clouds of caustic lime powder to defeat the Characitani of Hispania, who had barricaded themselves into inaccessible caves as a last act of defence.

258 years later in 178 AD, an armed revolt by peasants in China was supressed when chariots equipped with bellows rode into the crowd and blew lime powder at the rebels.

It was commonly used in medieval naval battles with ships throwing it at each other. This was so effective that in the 13th century, Henry III’s English navy is said to have destroyed an invading French fleet by blinding their enemy with quicklime.


Greek Fire was powered by quicklime, now a major contributor to damaged bricks
Quicklime is thought to have been one of the components of Greek Fire before it started causing issues to bricks in 21st century Britain

Quicklime is even thought to have been one of the components of Greek fire, the legendary weapon used by the Byzantine Empire which ignited on contact with water and struck fear into the hearts of European crusaders and other wannabe conquerors.

Whilst lime powder is good for securing the safety and prosperity of empires and sinking French ships, it is not something which you want to have in a wall. When a clay brick containing calcium oxide becomes wet, it can cause an eruption to the face of brick.

In a country like Britain where it rains rather a lot, that is a bit of a problem. Thankfully, chunks exploding out of bricks does not cause structural integrity issues. Some people even like the weathered look.

Not our customer though. They were working on a site in the south of England, which had been severely affected by lime blow. Our challenge was to help formulate a way to restore the bricks so that nobody could tell that they had been damaged by the same compound used to quell revolts in Imperial China.

Magic Sculp is finer than most other modelling putties. It has a soft consistency and does not shrink or crack when formed in large structures. Those properties made it ideal for filling the holes in the brickwork caused by lime blow.

Regular users of Magic Sculp will know that it cures grey. To colour match the putty to the brick, our customer came up with the inspired idea of wetting the putty once it had been applied to the wall and pushing dust taken from the brick into the putty.

To give the putty the same texture as the existing brickwork, they pierced the putty with a wire brush. The result is incredible – see if you can spot the area which has been repaired on the photo below…


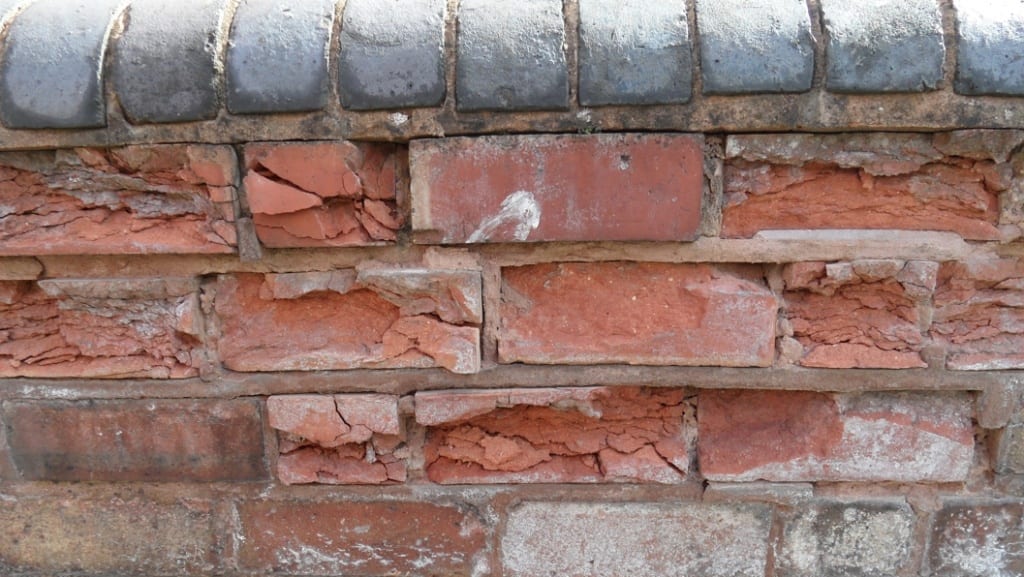
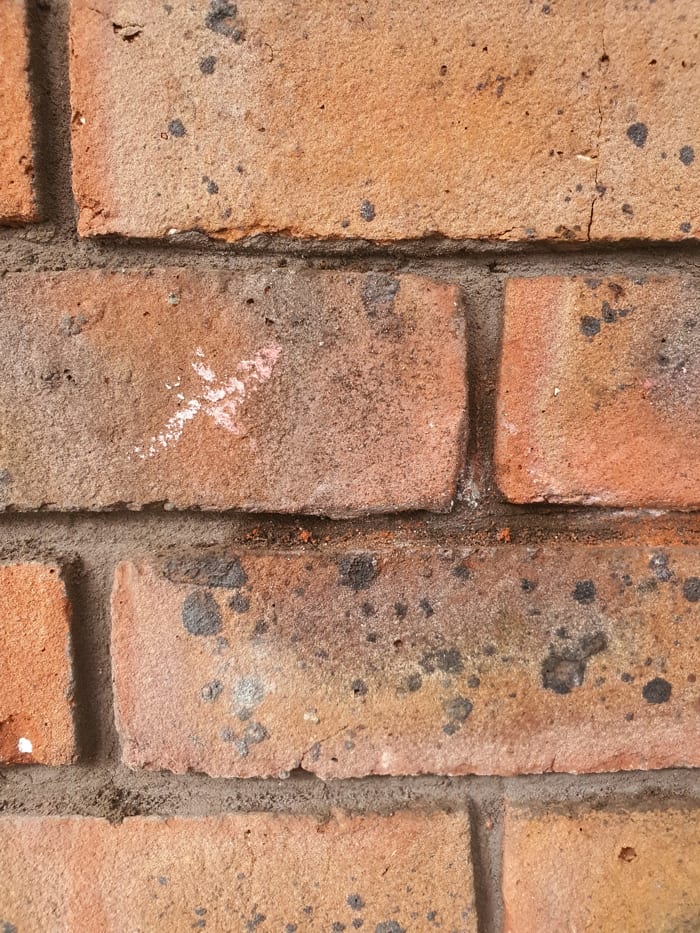
Brickwork restoration carried out using Magic Sculp
Spot the area of brickwork which as been restored…

Difficult, isn’t it? You can find out if you were right when we reveal the before photo at the end of the article. Needless to say, both the customer and the team here at SylCreate were delighted with the outcome.

We wrote a while back about the benefits of combining Green Stuff and Magic Sculp together to create a hybrid putty with unique properties. What this project has shown is that you can do much more when it comes to mixing Magic Sculp then simply kneading it with other putties.

If you have a restoration or model making task in which a very specific colour is required, then mixing existing material particles of that colour – such as brick dust – into Magic Sculp can help customise the putty to a degree we did not appreciate was possible before.

This adapted version of Magic Sculp is not the only putty which can be used in brick restoration. We also supplied the customer with their own customised version of Geomfix Coloured. Because we make Geomfix onsite here at SylCreate, we can match it to practically any colour imaginable.


Originally, these colours were based on Swarovski crystals as the purpose of Geomfix Coloured was custom jewellery manufacture. Now though we are seeing the benefits of being able to offer brick coloured epoxies for restoration and repair projects.

Brick coloured epoxies, Magic Sculp with brick dust. Who knew modelling putty could be used to repair 21st century brickwork damaged by the same chemical reaction that was the secret behind Greek Fire 1,500 years ago?


As promised earlier, here is a photo of the brick before restoration. Did you manage to spot the repaired area?

Before and after of a restoration project carried out to damaged brickwork caused by lime blow using modelling putty

Posted on 1 Comment

The benefits of mixing modelling putties

Mixing modelling putties such as Green Stuff and Geomfix Original A+B together can help to create a unique putty for more detailed works

When a Michelin star chef is concocting a new meal for their award-winning restaurant, they will chuck all kinds of ingredients together in the search for perfection. Which is something the world’s leading model makers do too, mixing modelling putties to create the perfect material for the job at hand.

It is an obvious approach to take to model making when you think about it. Say you are working on a fantasy figure which required the detailing that Green Stuff provides as well as the stiffness of Magic Sculp. Such a putty may not be available to buy on the existing market, but by combining the properties of two existing products, you can tailor-make a putty with the attributes you need.

People have long been mixing the range of modelling putties that we sell at SylCreate. When Games Workshop was in its golden age with modellers such as Alan and Michael Perry and The Goblin Master Kevin Adams, it was often said that they would use nothing but Green Stuff to create their high-quality fantasy miniatures – although that was not strictly true.

Green Stuff is a firm modelling putty, which allows it to hold detail well. It is sticky and flexible, meaning that it can be bent even when cured, making it the ideal putty for creating accessories which can then be moulded onto existing figures.

But when Alan, Michael and Kevin were making hard-edged models, they would add some Milliput to the Green Stuff. The two modelling putties mixed together formed a stiffer version of Green Stuff, creating a putty for carving detailed miniatures but with less of the flexibility of pure Green Stuff.


Green Stuff and Magic Sculp modelling putties mixed together to create military rolls
Green Stuff and Magic Sculp were mixed together to create these military accessories by Paul Wade at Red Zebra

Going the other way, Paul Wade at Red Zebra Military Models adds Green Stuff to his preferred putty of Magic Sculp. On its own, Magic Sculp is a softer consistency putty which has just the right resistance for sculpting. It does not shrink or crack, even when formed in large structures and it provides an extra smooth finish when worked with water.

It does not easily yield when cured though, which is a problem for Paul who sometimes requires a putty which is less brittle. When creating his figures and accessories from Middle East conflicts, Paul therefore mixes Green Stuff with Magic Sculp so that very thin sections become more malleable.

Paul has another reason for mixing Magic Sculp and Green Stuff. The smoothness of Magic Sculp combined with it being a very light colour means it is not always possible to pick out fine details when working in bright conditions. Adding a small amount of Green Stuff to Magic Sculp turns the putty to a light green colour, making carving easier.

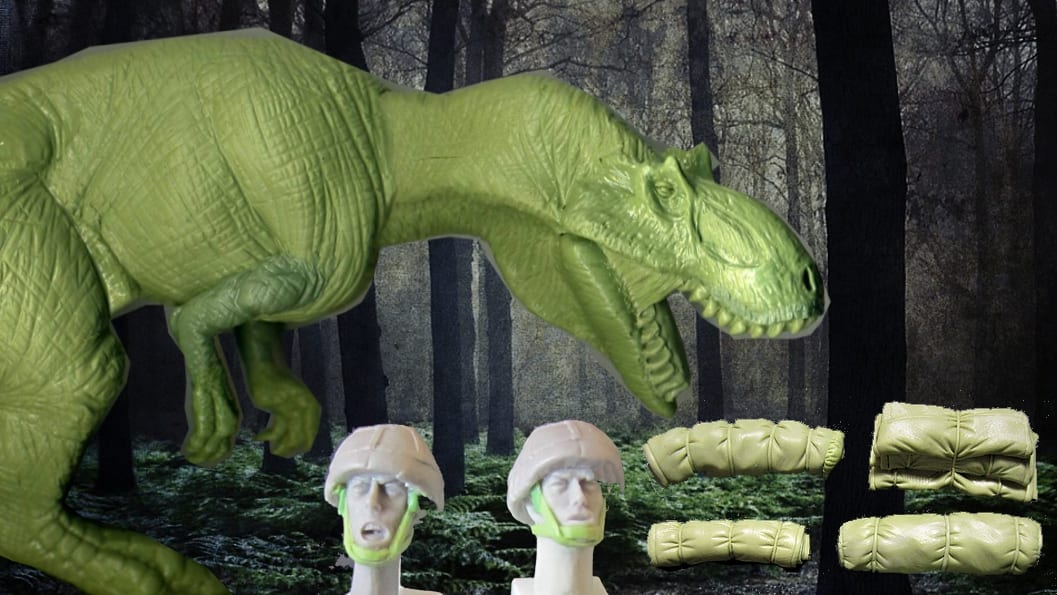
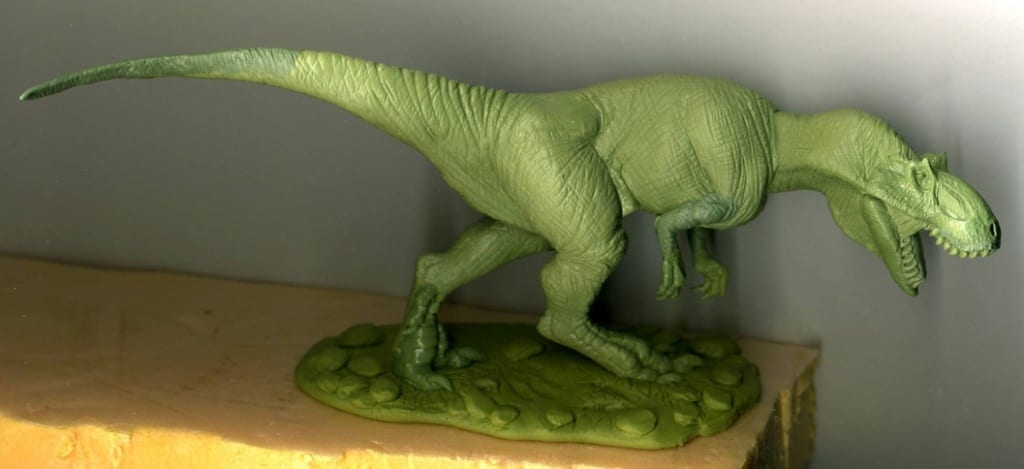
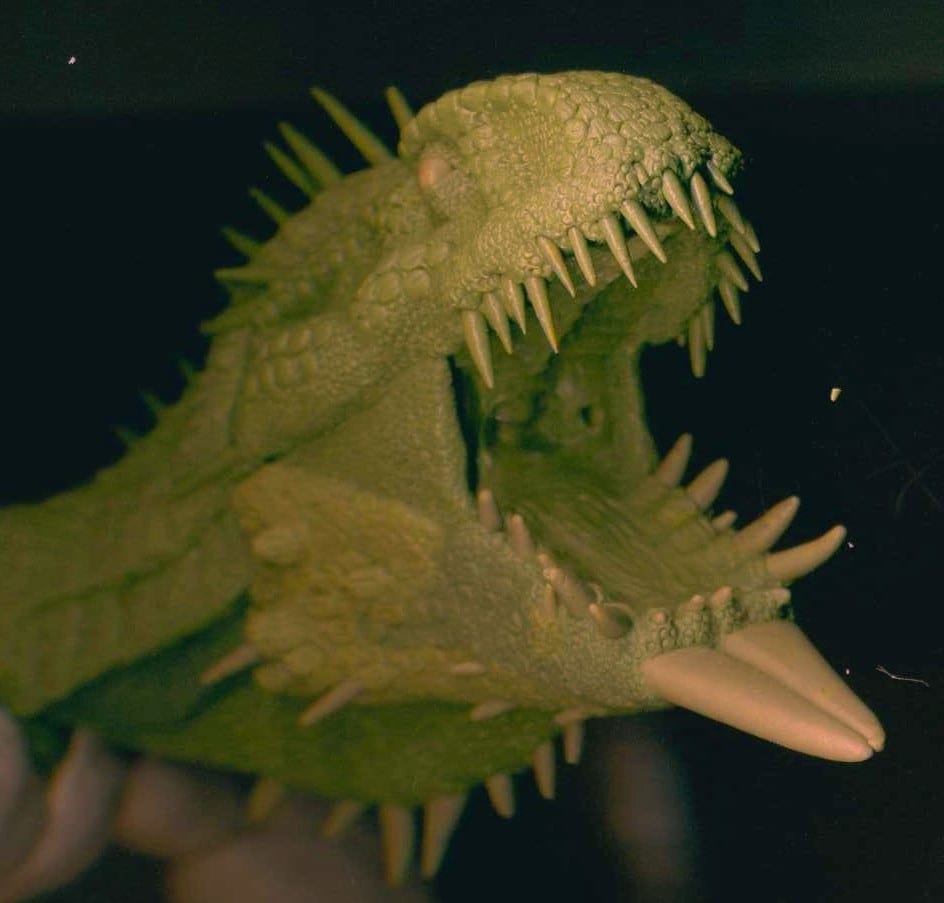
For bigger projects, mixing modelling putties together enables the creation of large scale models which are also easy to carve fine details into, as was the case for a SylCreate client who was working on a range of dinosaurs and dragons.

The client needed a putty which was easy to build up in bulk, but which could also hold a tremendous amount of detail when carved. They settled on mixing Geomfix Original A+B with Green Stuff. Geomfix is one of the hardest setting modelling putties available, making it popular for large-scale work. It responds well to tools without crumbling or breaking and cures without sagging or warping.


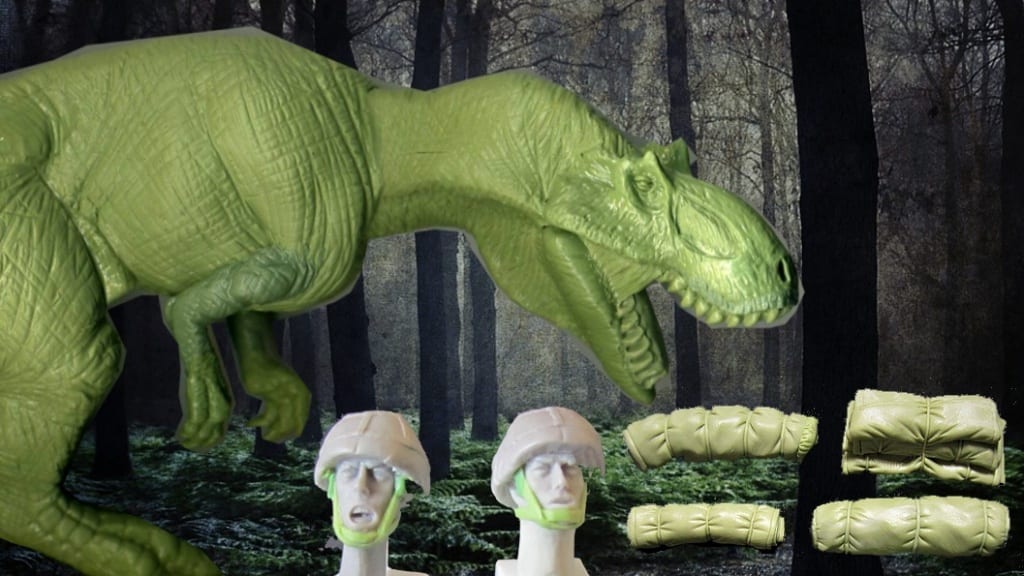
A large scale dinosaur sculpted with a combination of Green Stuff and Geomfix Original A+B
A Saurophaganax sculpted using a mixture of Geomfix Original A+B and Green Stuff
A fantasy dragon model sculpted by mixing Green Stuff and Geomfix Original A+B together
This highly detailed dragon was made by mixing Geomfix Original A+B and Green Stuff together

Geomfix was used to create the model and the top surface was then finished with the mixed putty of Geomfix and Green Stuff. The result was a highly detailed collection. The technique of combining the two putties together has since been advocated by Kneadatite on the section of their website which offers a guide for how to use Green Stuff.

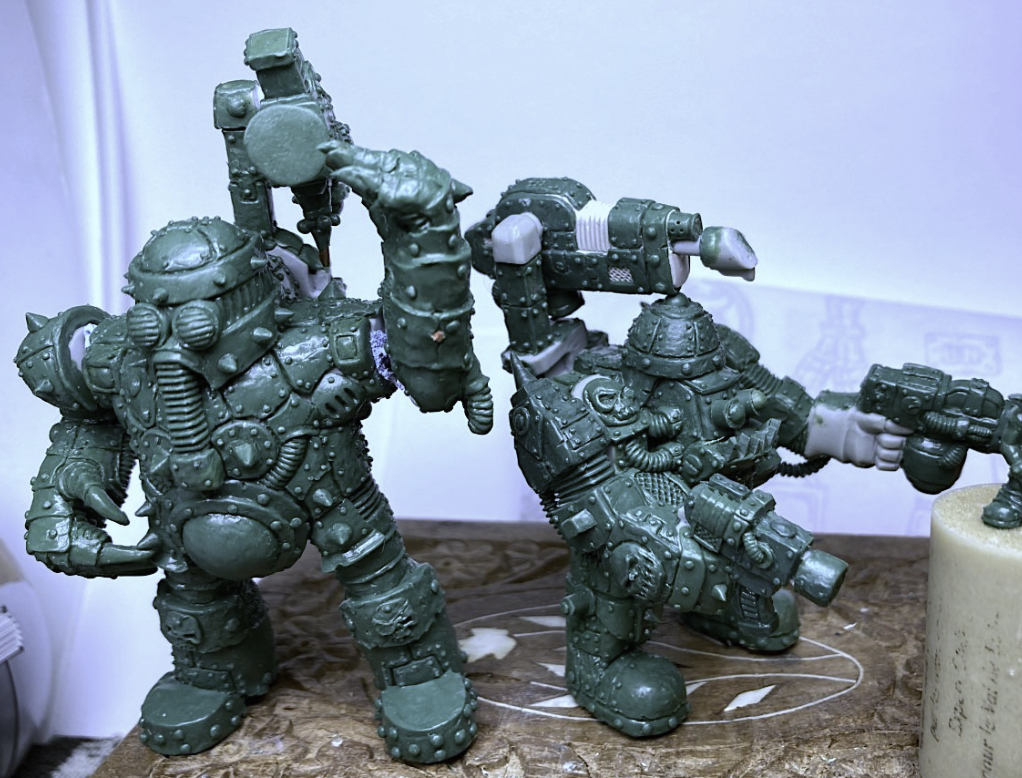
Using Geomfix Original A+B to build up and bulk out models is something which The Goblin Master does. We spoke to Kevin recently about a project he was working on involving an ogre dolly in which he combined his favoured Green Stuff with Geomfix.

“I use Geomfix for making larger models, like the ogre I have been working on,” said Kevin. “It was a hot day and so the putty was quite sticky and pliable, more so than Green Stuff or Milliput, but after 30 minutes or so it was stiffer and easy to work.”

“As far as a modelling medium goes, I rate Geomfix very highly. It is great for muscles and cloths, with Green Stuff the best for items like chain mail due to its ability to stretch more.”

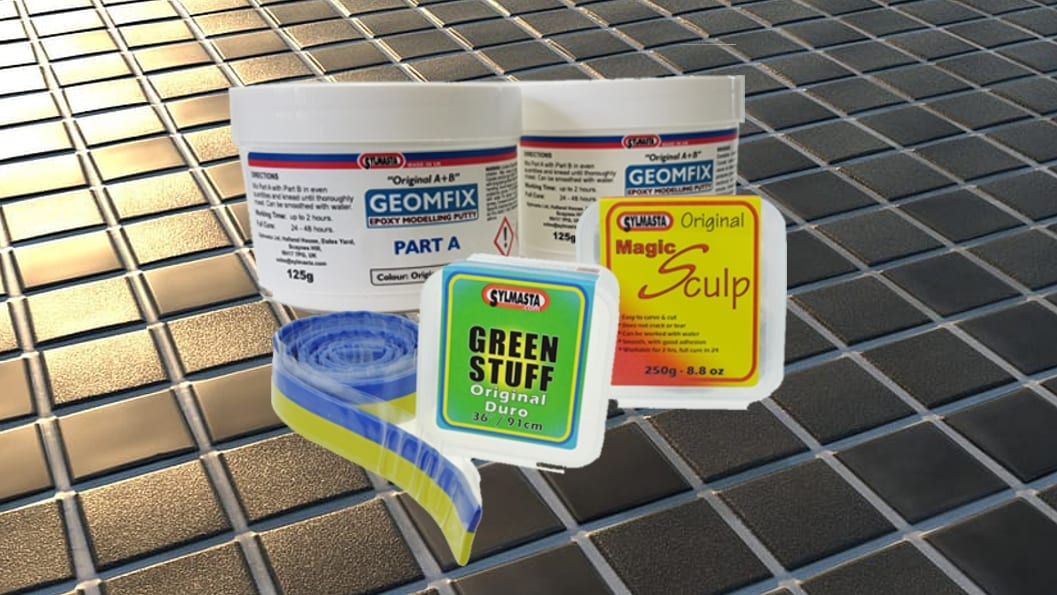
In view of the benefits that can be found from using mixing modelling putties together, SylCreate have decided to make the process even easier by releasing a new Modelling Putty Kit. The Kit consists of Green Stuff, Magic Sculp and Geomfix Original A+B at a cheaper cost compared to purchasing each putty separately.

Two sizes of Modelling Putty Kit are available. The Standard Kit contains a Green Stuff Reel 36”, Magic Sculp 250g and Geomfix Original A+B 250g, offering a saving of £8 on individual putties. The XL Kit has double the amount of products with 2 x Green Stuff Reels 36”, Magic Sculp 500g and Geomfix 500g for a saving of £13.90.

You do not have to mix the putties together to gain from purchasing as part of the Modelling Putty Kit. The putties included in the modelling kit can be kept separate and used to create a series of components which are then combined together to create a final model.

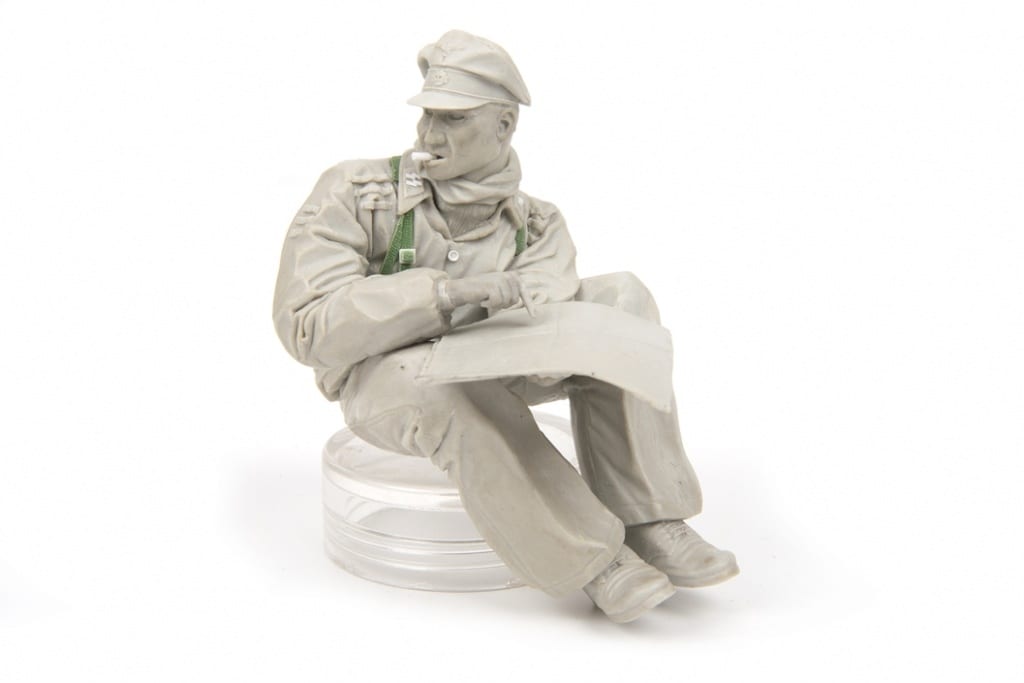
Award-winning modeller David Parker takes this approach to his model making. David’s putty of choice is Magic Sculp, which he uses to sculpt his main body of work including his internationally-acclaimed tank crew. For detailed insignia and supporting accessories such as belts and hair, David uses Green Stuff because of its elastic properties and firmness.


Magic Sculp and Green Stuff are used to create separate parts of this tank crew model
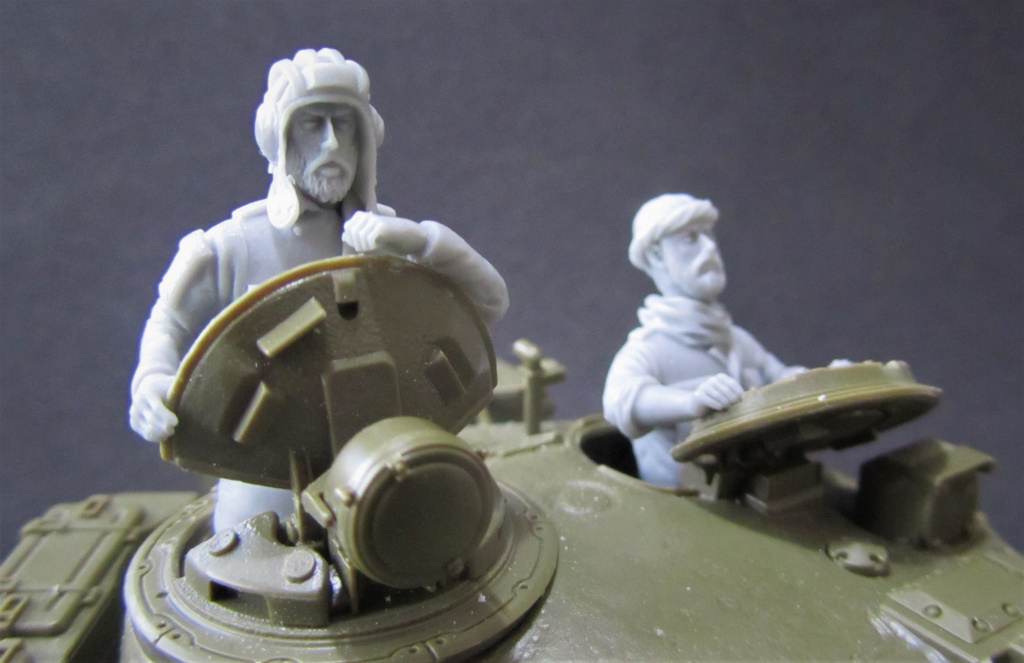
Tank crew sculpted by David Parker out of Magic Sculp, with additional Green Stuff used to provide straps
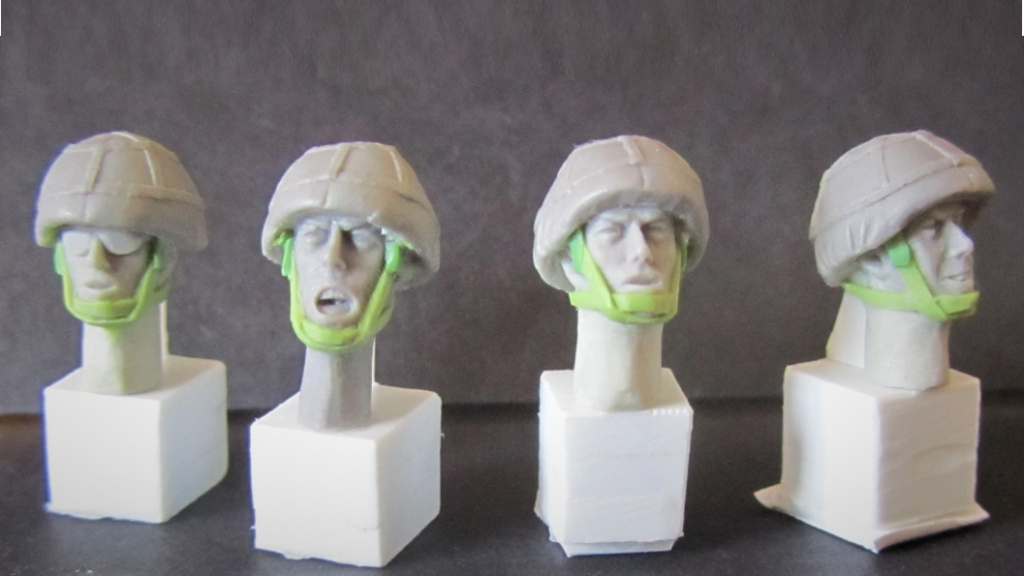
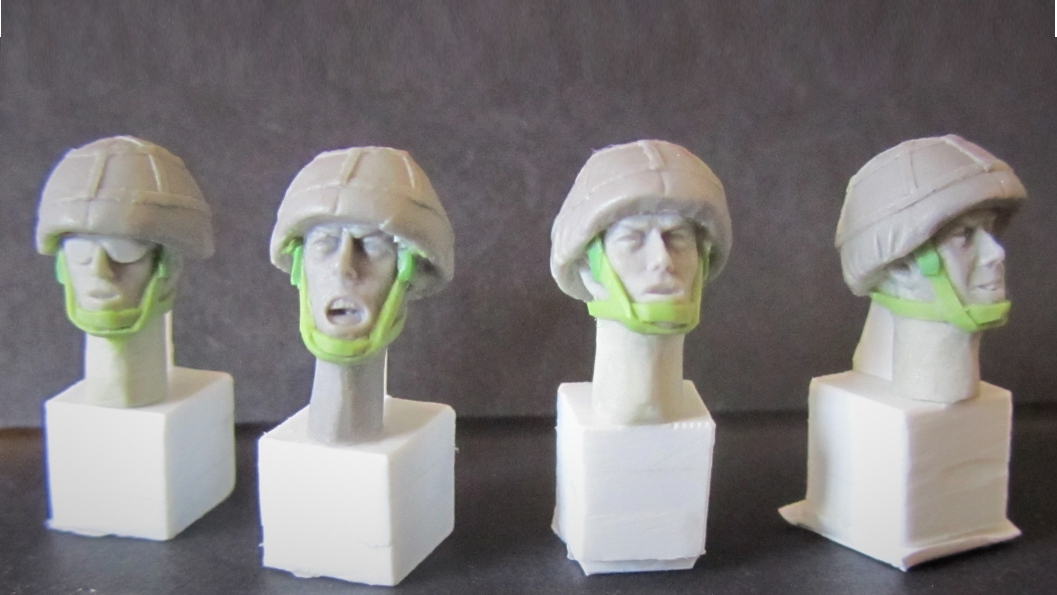
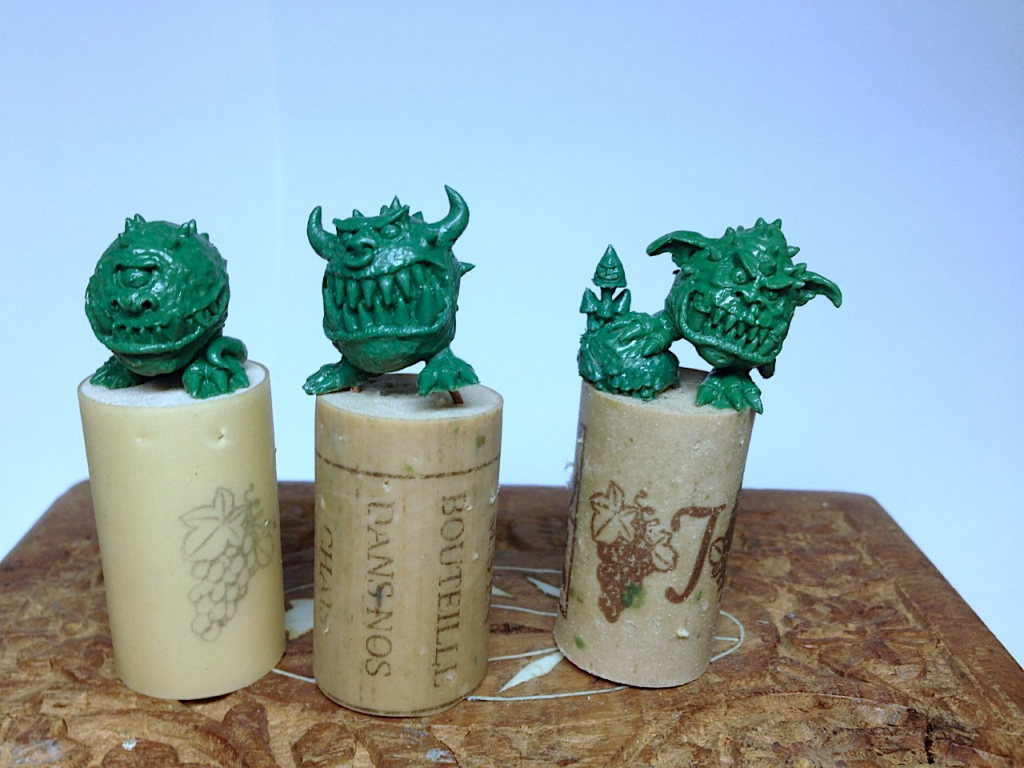
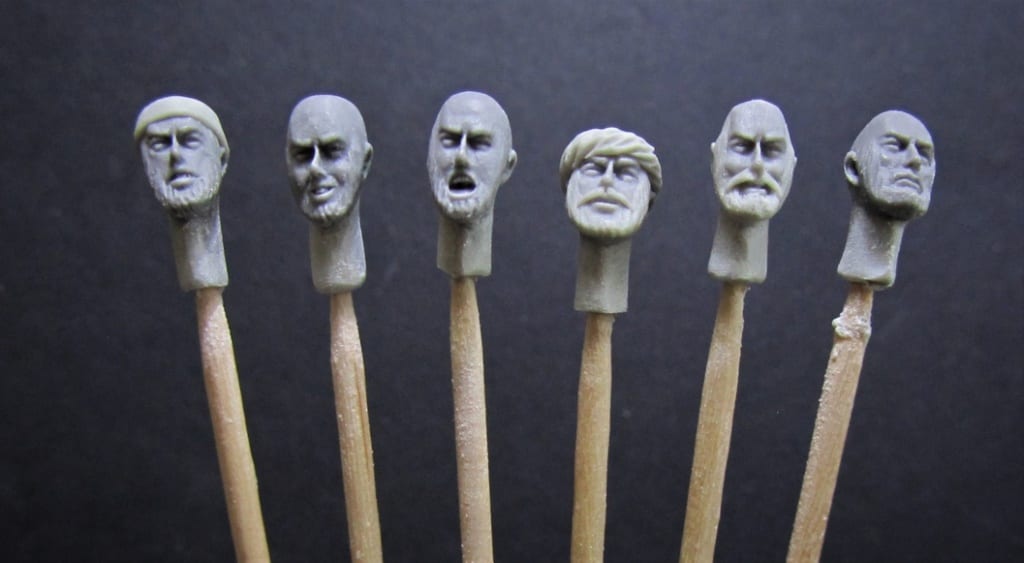
Paul Wade use Green Stuff to add the finishing touches to these heads sculpted from Magic Sculp

He then attaches the components made from Green Stuff to the components created from Magic Sculp, creating highly detailed models. Red Zebra also create their masters in this way. The intention is that the Modelling Putty Kit will provide a more cost-effective purchase for all model makers who use multiple putties in their creations.

Whether you intend on mixing the putties together or using them separately in one project, we would love to see your work created using our latest Kit. You can email photos and a write-up to sales@sylmasta.com and help us to tell the world more about the benefits of mixing modelling putties.


Posted on Leave a comment

David Parker’s Crew School and bringing figures to life with the man himself

David Parker's Crew School features tips and tricks from one the world's leading figure makers for creating realistic tank crews

There are bad examples of peer pressure and good examples of peer pressure. Going out to the pub for a ‘quick drink’ with your mates because they have bullied you into it and then not getting home until gone 2am is bad peer pressure.

Good peer pressure is when an award-winning model maker is convinced by his friends to write a book which shares his secrets. Which is exactly what happened to David Parker – with the result being David Parker’s Crew School, a must-read for anyone with an interest in producing tank crew figures.

“The inspiration came from some fairly persistent demands from friends that I should put together a guide to my figure techniques,” David explains. “I have always felt that a unique or individual crew figure will lift a model and I am aware that for many, the idea of even painting a commercial figure is simply too daunting – let alone sculpting, converting and adapting one.”

Which is what David does, as a glut of international awards is testament to. It is also why his AFV Modeller Magazine has been going strong for approaching 20 years now.


Like most, David’s model making journey began as a child with model aeroplanes. When he went to University in the mid-1980s to study Fine Art, his modelling was put on hold due to being “more interested in beer and girls.”

Once David graduated, he got back into model making whilst working as a graphic designer at his own advertising company. David wrote for various UK modelling magazines throughout the 1990s at the same time as expensive model making magazines from Japan would frequently arrive at his office.

David preferred these Japanese publications because of the vastly superior quality of their photos – even though he could not understand a word of what was written inside.

It was at that point that his business partner asked what would turn out to be a life-changing question: Why didn’t he do an English magazine in the same way that the Japanese do? AFV Modeller was born and began publication in 2001. The advertising business was soon shut down as all efforts went into the magazine and four years later, AIR Modeller was launched to deal with the aircraft side of modelling.

“AFV Modeller magazine as a very different style of modelling magazine aimed at the serious end of the hobby,” explains David. “The focus was always on quality and graphic presentation.”


David Parker's Crew School contains something for everything, whether you are a modelling beginner or a skilled and experienced sculptor
There are lessons for everyone in David Parker’s Crew School

That mantra is evident throughout David Parker’s Crew School book too. It is a 112 page guide which features high-quality photos and easy-to-follow instructions for painting and customising figures to create totally unique tank crew.

“Possibly the biggest barrier to the modeller using crew figures is the idea that they cannot paint faces,” says David, who then spends the first 10 pages dismantling those barriers, including the challenges which come with moving up in scale, where more detailed painting is required for greater realism. “That’s why the book begins with painting and what I hope is a good, solid base for techniques so that readers can master it.”

After tackling face painting, David moves onto uniforms. Achieving the exact colour required for plain uniforms is made to seem easy. Even getting camouflage right appears simple thanks to the detailed breakdown that David provides.

Once painting is dealt with, David moves onto explaining the differences that position can make to a tank crew. “Small changes to a uniform or the pose of a figure can give it that unique edge. In the book, I wanted to show how to change poses by, for example, repositioning an arm.”

Repositioning an arm is one thing. Next, David deals with sculpting entirely fresh body parts and accessories and using them to adapt existing figures. Over the course of the book, figures receive new arms, heads, hats, shades, belts, straps, insignia, body armour, additional clothing, and items in their pockets.

By adapting figures in this intricate way, a completely new tank crew can be created. David says that these adjustments present “ambitious changes before tackling fully sculpted figures for the more experienced modeller.”

These fully sculpted models are created with the help of mannequins in 1:16 and 1:35 scale. David explains how to develop figures which can suit any scenario, bringing to a close the tutorial section of David Parker’s Crew School.

Over the remainder of the book, David shows how he has employed these techniques on various tank crew projects. The last of these projects is the recreation of a scene which will be familiar to many model makers; the famous image of a crew consulting their maps at the Kaiserbaracke road junction on the N23 road between St Vith and Malmedy during the Ardennes Advance of 1944-45.


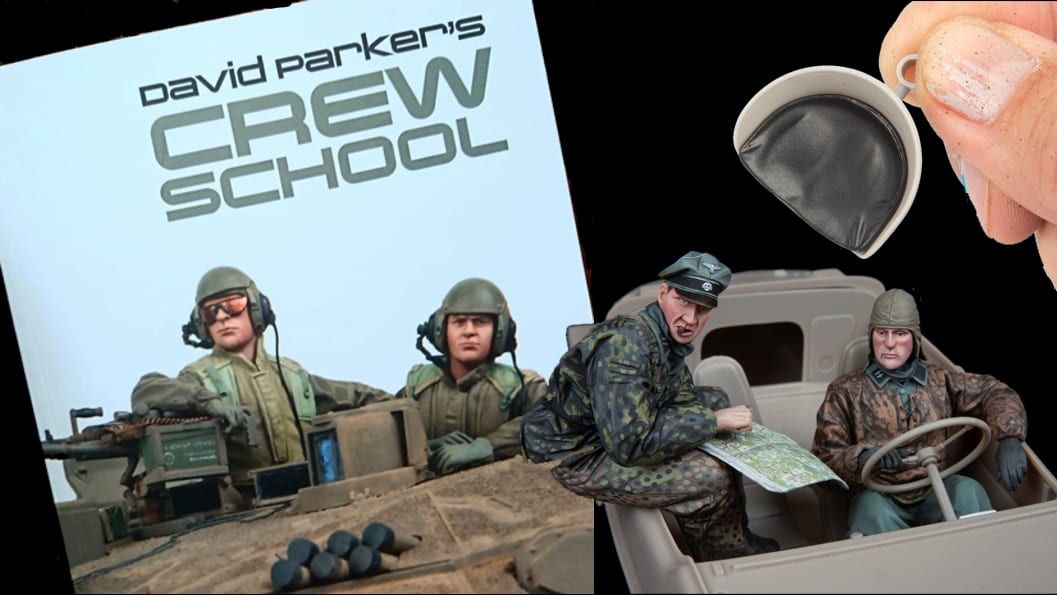
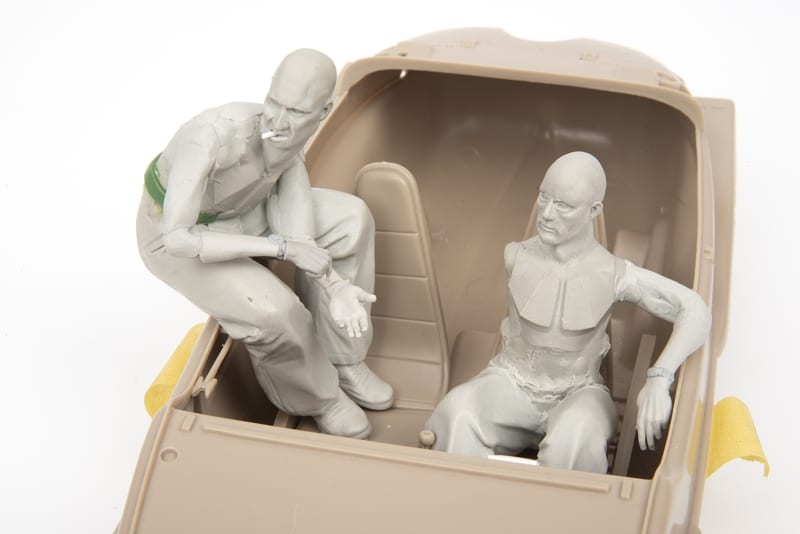
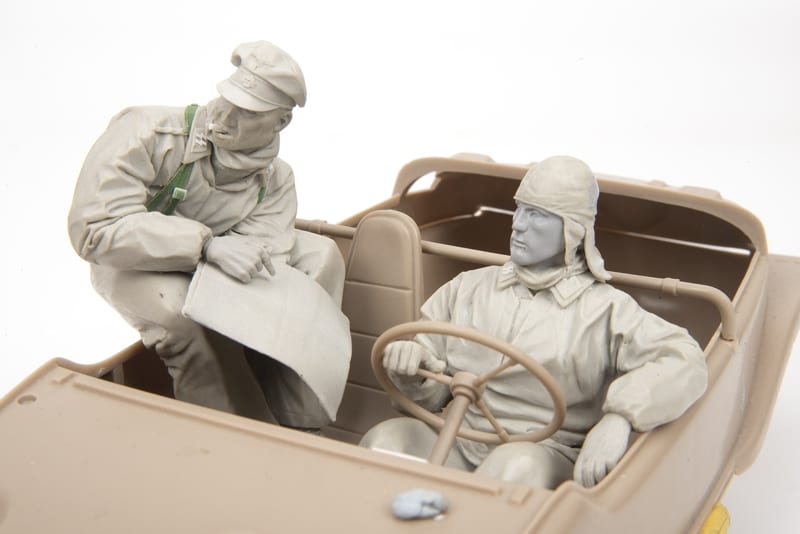
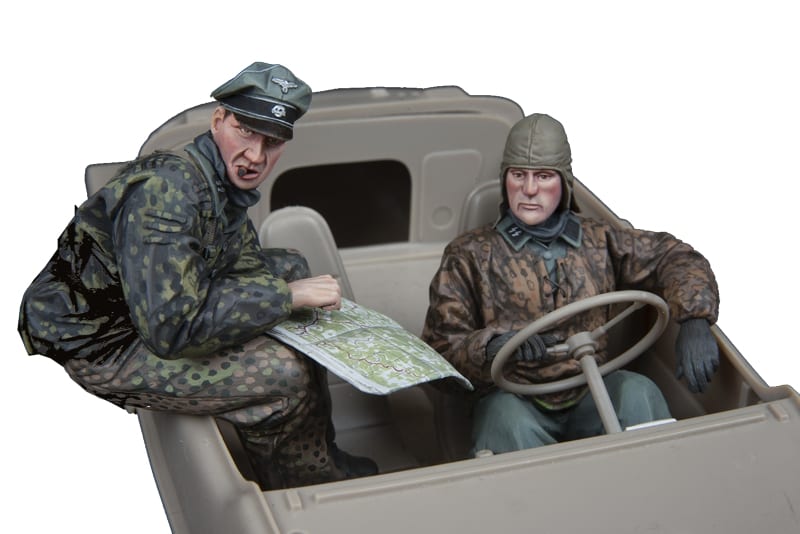
An Eduard Schwimmwagen Crew being sculpted by award winning model maker David Parker
David Parker's Crew School provides step-by-step guides to creating high-class tank crew miniatures
David Parker recreates the gamous scene of a crew  consulting their maps at the Kaiserbaracke road junction on the N23 road between St Vith and Malmedy during the Ardennes Advance of 1944-45.

David uses his 1:16 mannequins to model the crew for the Eduard Schwimmwagen, detailing each step in the creation of the figures through to the completed model, which is then photographed outdoors in fading winter light with a background of conifer trees.

It perfectly captures the mood of the original photos and is a striking way to end, pulling together all the techniques and advice that have been poured into the book in the preceding pages.

The result is a book that explains and then demonstrates, ensuring that it offers something for everyone – beginners will learn invaluable lessons and more experienced model makers can benefit from the tips and tricks that David has laid down in print.

The book finishes with an appendix in which David lists the products and equipment that helped bring his figures to life. It is a nice touch and allows the reader to learn a little more about the preferred tools of a leading model maker.

His putties of choice are Green Stuff and Magic Sculp, two SylCreate products which he dedicates two pages towards extoling the virtues of. He also explains why he uses Swann-Morton 10 and Swann-Morton 10A blades for carving and trimming. There is even an adapted kebab skewer listed for sculpting – perhaps another throwback from those student days of beer and girls?

“The approach has been to try to demystify the processes and to encourage the modeller to try new techniques with a guide to tools and sculpting putties.” And David Parker has certainly succeeded in that aim with David Parker’s Crew School.

It is an excellent step-by-step guide to getting the very best out of tank figures. Not only that, but it is genuinely entertaining too – and there is no better way to learn than when it is fun. Let us hope that David’s friends can pressure him into writing more books in the future.

David Parker’s Crew School is available to buy from the AFV Modeller Website, where you can also subscribe to AFV Modeller and AIR Modeller Magazines.


Posted on 2 Comments

Meet the military modelling company with the Middle East at its heart

Red Zebra are a military modelling company who specialise in creating figures from conflicts in the Middle East using Sylmasta Magic Sculp and Green Stuff

Military modelling is big business and whilst much of the demand focuses on World War II, one company has exploited a growing interest in conflicts from the Middle East – Red Zebra Models.

There are so many intriguing questions surrounding Red Zebra and their work that it is hard to know where to start. Why do they focus on the Middle East? Where does the name Red Zebra come from? And perhaps most interestingly, how did the company come to recreate real-life snipers from the fight against ISIS as models?

To understand the story of Red Zebra, you have to start at the very beginning with founder Paul Wade. It’s Paul’s journey through life that underpins Red Zebra.
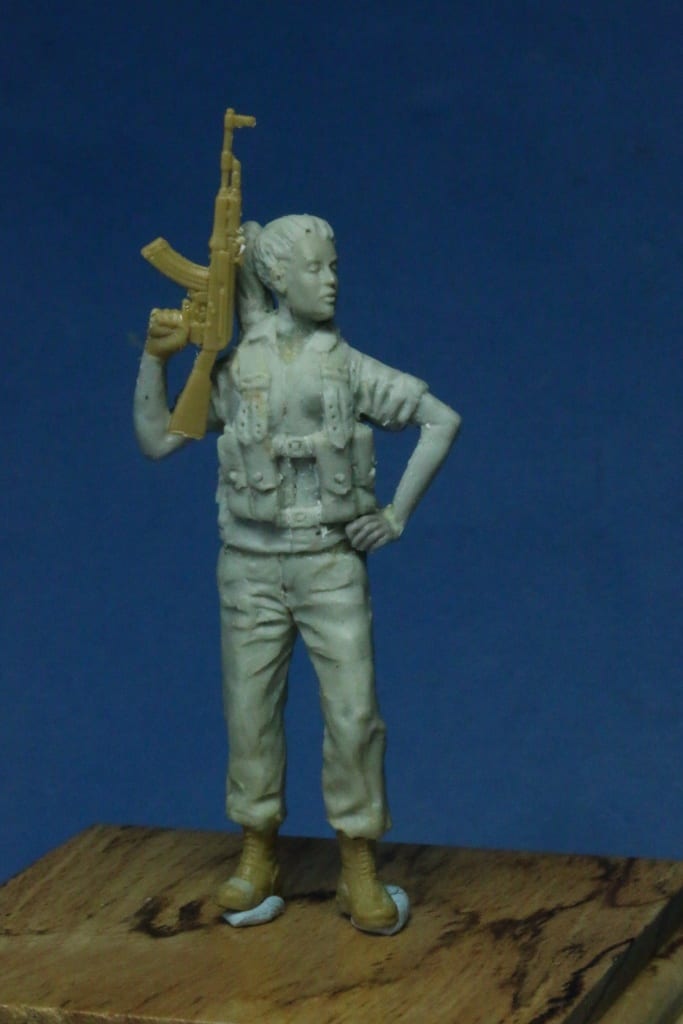
“I started building models when I was a kid,” says Paul. “I think it’s fair to say that these models wouldn’t win any competitions as they were covered in glue fingerprints and looked like they’d been painted with a mop.”

“As I got older, I began to take a little more care and some of my models would look a bit more like what they should have been.”

Paul also became interested in making his models look more realistic. This was a time before the internet, when accessories and other addons were very limited.

Paul wanted his model tanks and trucks to have figures, bags and tarpaulins which would help them bear a closer resemblance to the real life versions that he had seen in books and on television.

The only way to achieve this was by sculpting his own accessories. Soon, modellers began to ask where Paul had bought his accessories and figures.

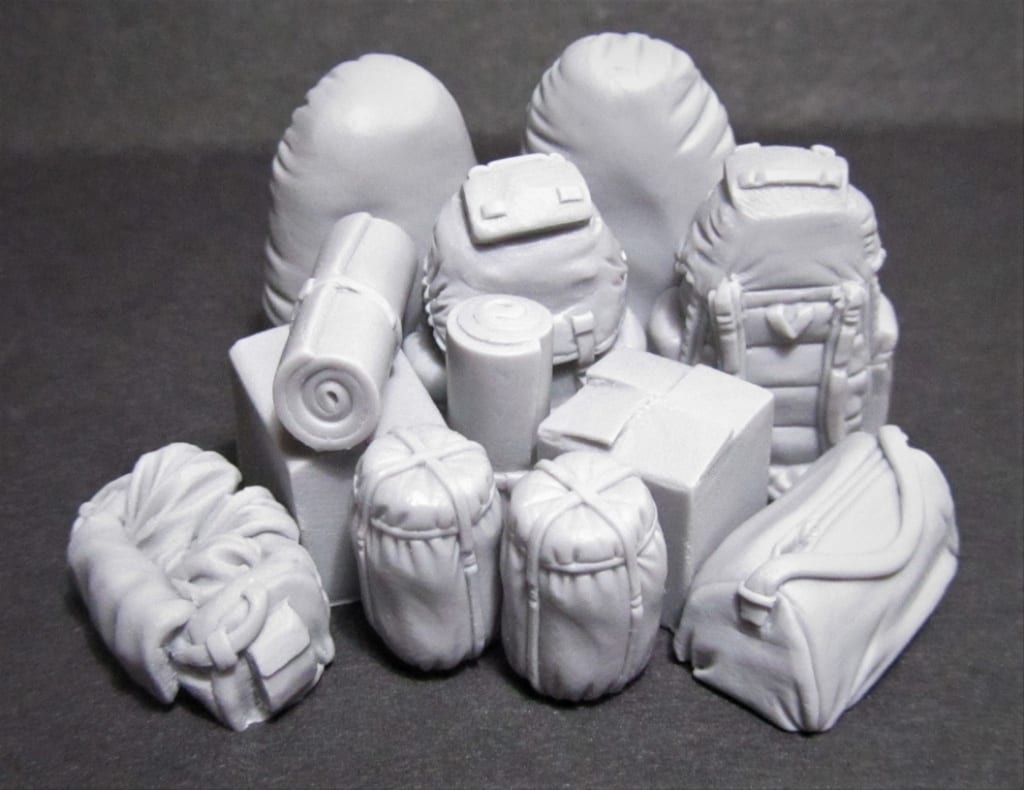
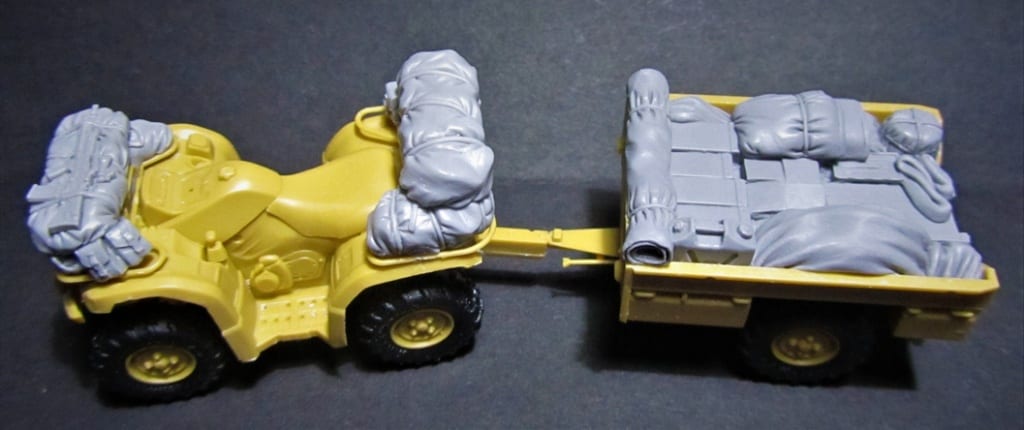
Red Zebra Models create miliatry accessories such as bags to go with existing kits
Red Zebra founder Paul Wade started out making accessories for military model kits

Military accessories created by Paul Wade of Red Zebra Models using Magic Sculp

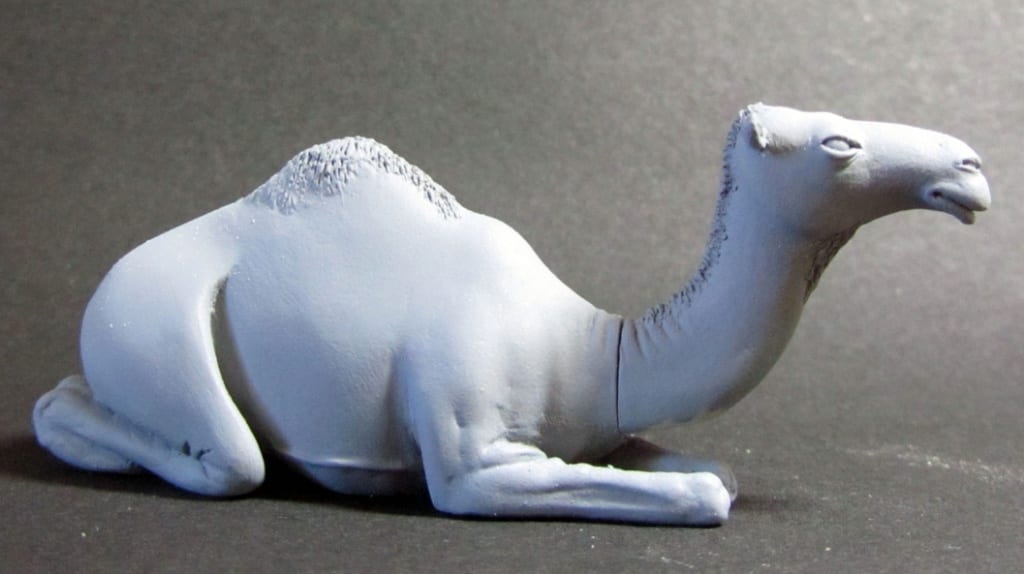
A camel created using Sylmasta Magic Sculp as part of a military modelling accessories kit
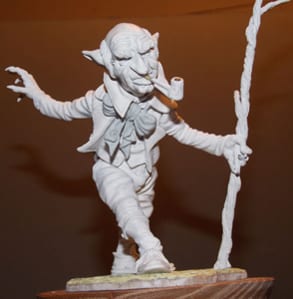

“When I told them I’d sculpted them myself, they would always be very surprised. Over the years, it got to the stage where I enjoyed creating the accessories more than building the actual kits – which gave me the idea of setting up my own company.”

And so Red Zebra was born. By this point, Paul had spent many years living and working in the United Arab Emirates and Qatar.

Spending so much time in the Middle East gave him a real interest in conflicts in the region, and so instead of just producing World War II military modelling accessories, Paul wanted Red Zebra to include modern day subjects as well.

Among those subjects are real life snipers. While researching on the internet, Paul came across a photo of what appeared to be an old man in a boiler suit carrying a very large rifle.

This turned out to be Abu Tahsin al-Salhi, an Iraqi sniper known as the Sheikh of Snipers. He was credited with killing over 384 ISIS members during the Iraqi civil war, the final chapter in an extraordinary career.

“I’d sculpted a lot of figures over the years,” says Paul of al-Salhi, “but they all tended to be regular soldiers. The look of this person certainly appealed as something completely different, which is what Red Zebra is about.”

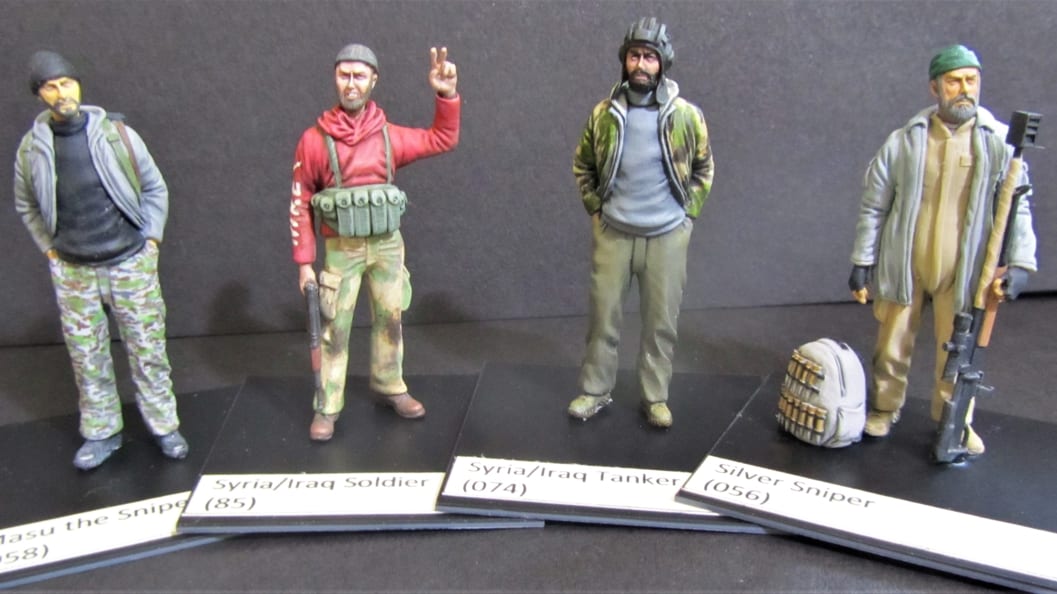
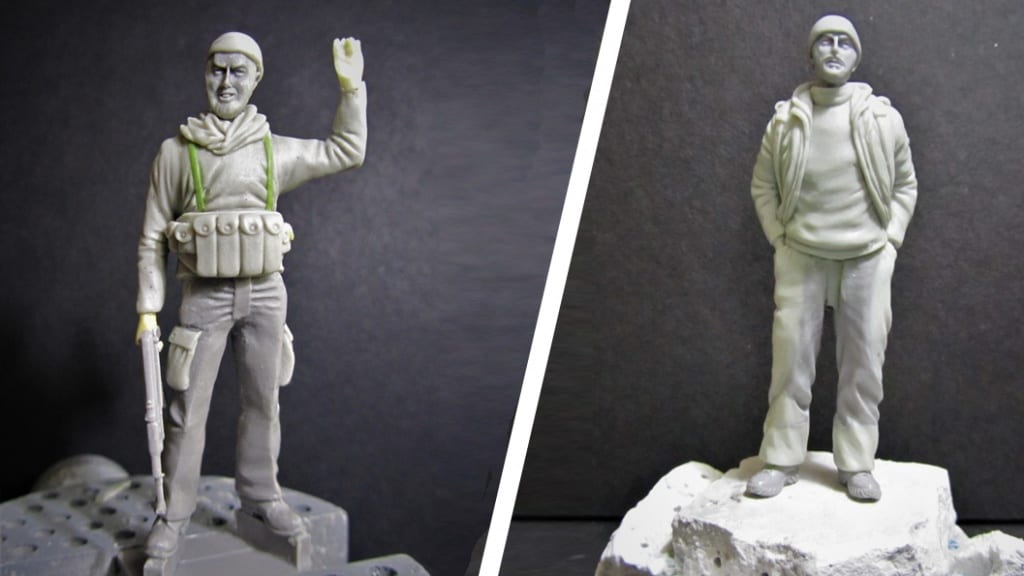
Paul Wade has turned real life snipers from the fight against ISIS into modelling figures using Sylmasta Magic Sculp
Two real-life snipers from the fight against ISIS recreated by Red Zebra

Paul’s research into al-Salhi led him to discover another photo. This was of Musa Herdem, an Iranian sniper who came to international attention when he was revealed to have successfully shot ISIS militants from a distance of 400 metres.

“What stood out to me about the second sniper was that he was stood there with his hands in his pockets and his rifle over his shoulder. I liked the idea of the relaxed casual pose and once I found out some history about Masu, I just had to sculpt this individual.”

Snipers, machine guns, bedrolls, animals – everything that Red Zebra make is currently produced in-house, from creating the masters to making the moulds and undertaking all the castings. Red Zebra even produce their own artwork for the packaging.

All the masters that Paul creates are made with either plastic strip/sheet or Magic Sculp. Sometimes, he will use a small amount of Green Stuff. He has even combined the two modelling epoxies when the project has required it.

Military accessories created by Red Zebra Military Modelling

“Both Magic Sculp and Green Stuff have their own plus points. Magic Sculp isn’t too sticky and even has a bit of a waxy feel. It can be rolled out into very thin sections, especially if left to cure for a short while, so that it’s a little bit firmer.”

“Green Stuff is sticky once kneaded together, which is good for creating straps on figures or small details to attach to a master, like straps around a bedroll or haversack.”

“By mixing a little bit of Green Stuff with a ball of Magic Sculp, it’s possible to combine the waxy feel with the stickiness. It means that very thin sections are not quite as brittle as they would be when using straight Magic Sculp.”

Paul has made unique tools of his own over the years to help in the modelling process – as well as relying on the traditional instruments of the trade.

“Regardless of the modelling material, we still rely on paintbrushes, rubber sculpting brushes, cocktail sticks and scalpels.”

“When I lived in Dubai, Sylmasta even sent me some Magic Sculp and Green Stuff after I’d run out. So, thanks for that!”

Red Zebra sell their military modelling accessories all over the world via mail order and through model shops in Belgium, Netherlands, Beirut and at the Bovington Tank Museum in the United Kingdom.

You can find out more about Red Zebra and browse their extensive range of products over on the Red Zebra website.

Which leaves just one final point – where did Paul get the name Red Zebra from? “The idea was to come up with something different that people would remember. If you’ve seen our trade stand at model shows, then you can’t miss the red and black stripes.”

A memorable name and memorable colours for a memorable company.